
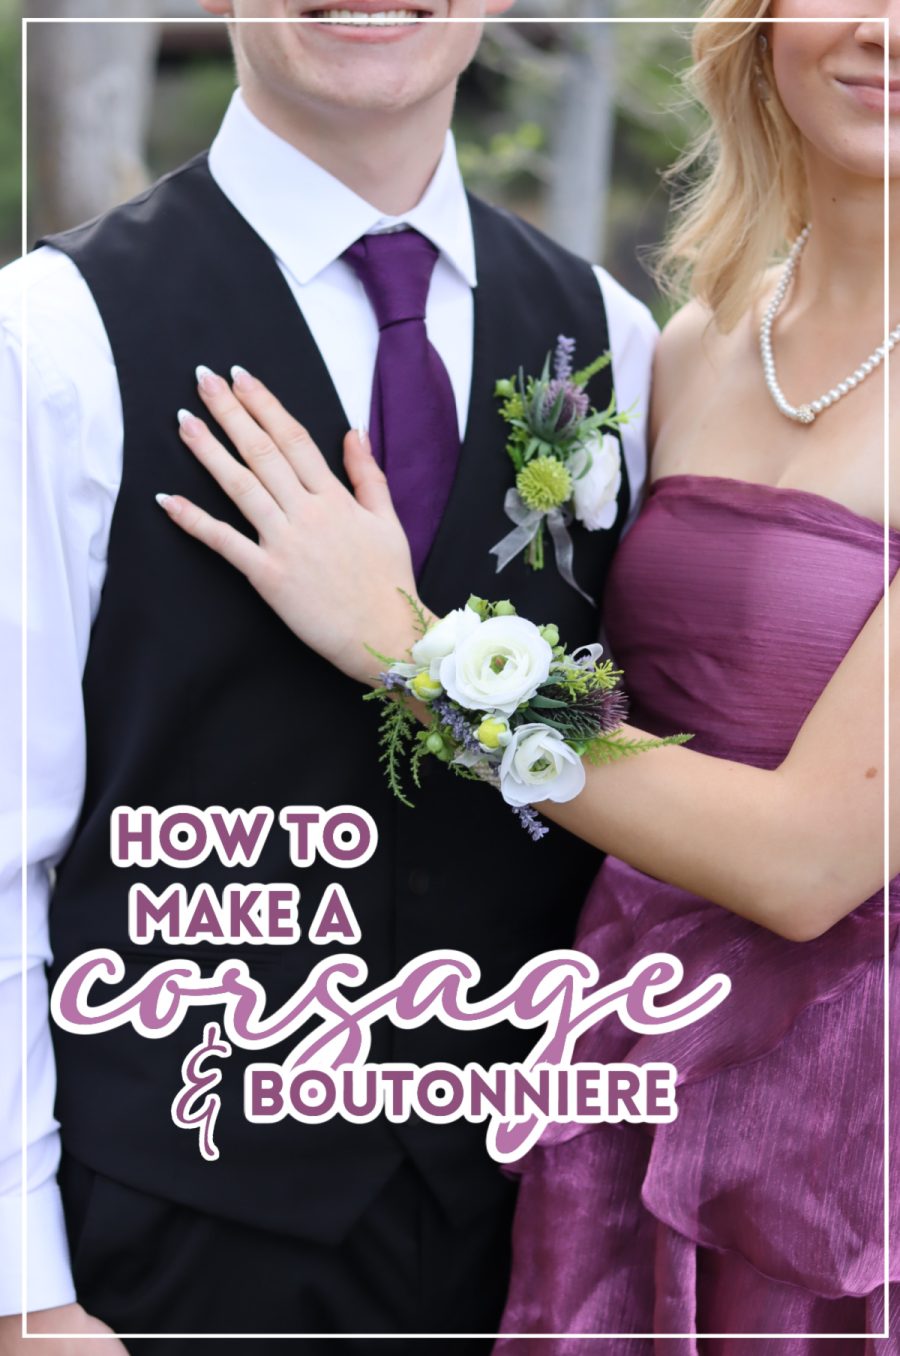
How to Make a Corsage and Boutonniere with Faux Flowers (Easy DIY Tutorial)
Making your own corsage and boutonniere with faux flowers is a beautiful way to save money and add a personal touch to special events like prom, weddings, homecoming, or formal dances. Faux flowers are long-lasting, easy to work with, and perfect for beginners who want professional-looking results without the stress of fresh florals.
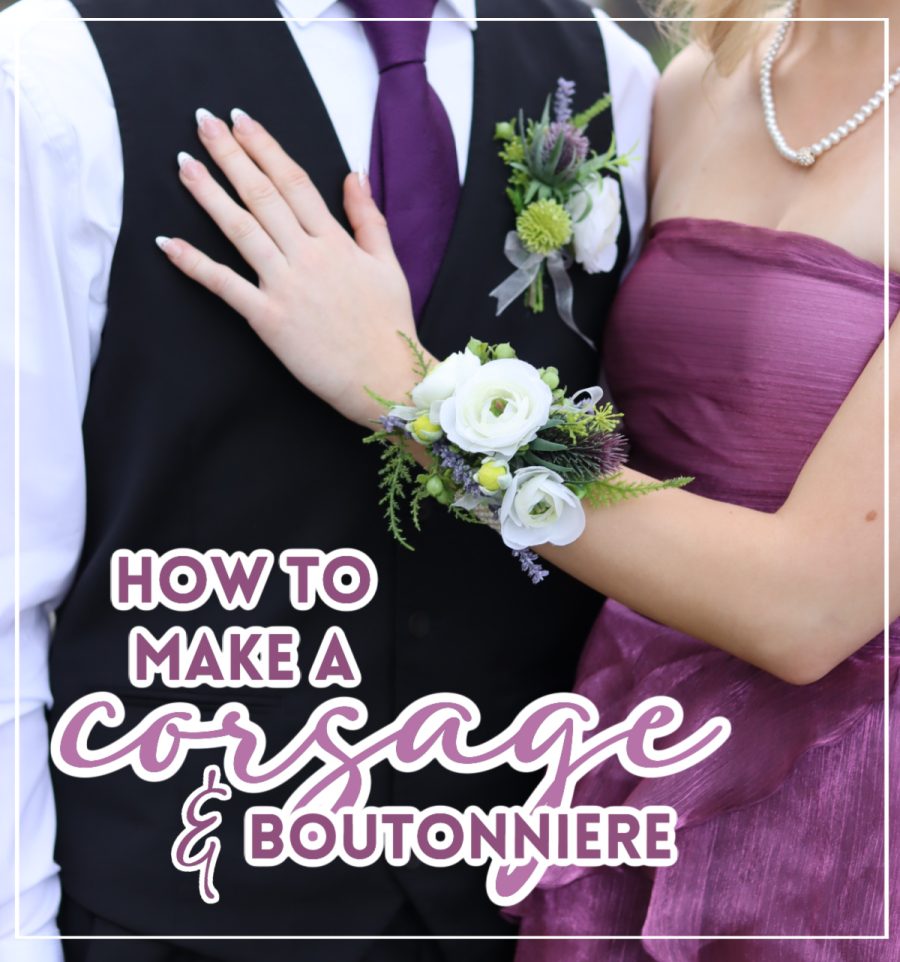
This simple DIY tutorial will walk you through how to make a corsage and boutonniere step by step using artificial flowers.
I actually put up a youtube video if you want to watch and craft along!


Why Use Faux Flowers for Corsages and Boutonnieres?
Using faux flowers has so many advantages, especially for DIY projects:
- No wilting or browning
- Can be made days or weeks in advance
- Budget-friendly and reusable
- Easy to customize colors and styles
- Great for beginners
- Keep-sake
Faux flower corsages and boutonnieres look just as elegant as fresh ones—and last forever as keepsakes.
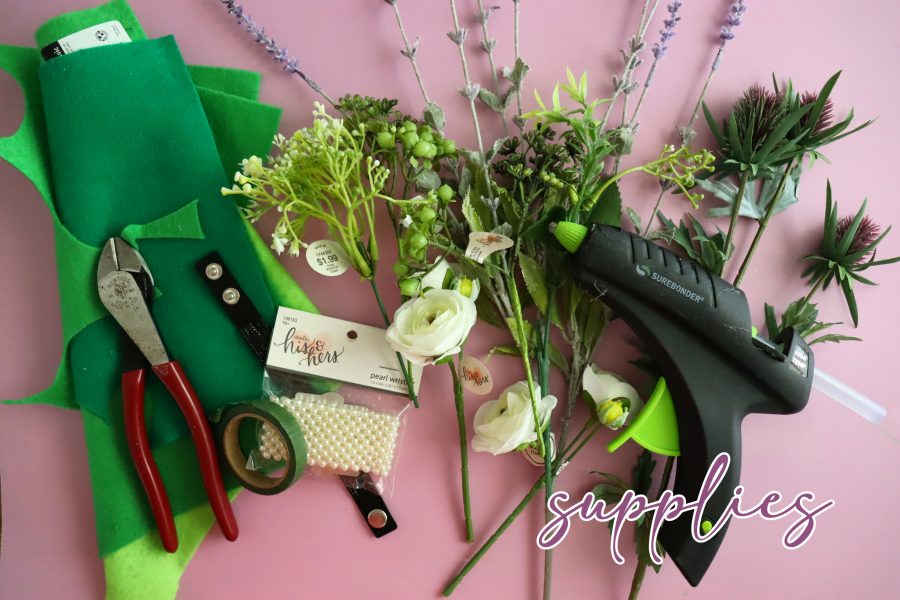
Supplies Needed to Make a Corsage and Boutonniere
Before you start, gather these materials:
- Faux flowers (variety of sizes)
- Faux greenery or filler stems
- Floral tape
- Ribbon (satin or sheer works well)
- Corsage wrist band or elastic bracelet
- Boutonniere pin or magnet
- Wire cutters or scissors
- Green felt
- Hot glue gun
I buy most my supplies from Hobby Lobby. The corsage section has lots of variety, and they go on sale often! If you shop the 40% off sales, it will be really inexpensive to make! I also found this set of boutonniere supplies on amazon that seems like a pretty great deal.
I like to buy the cute pearl/diamond wrist bands that Hobby Lobby sales, I have also seen people use slap bracelets, or you can easily buy a strip of elastic and sew it into a loop to make a bracelet! That would definitely be the cheapest route.
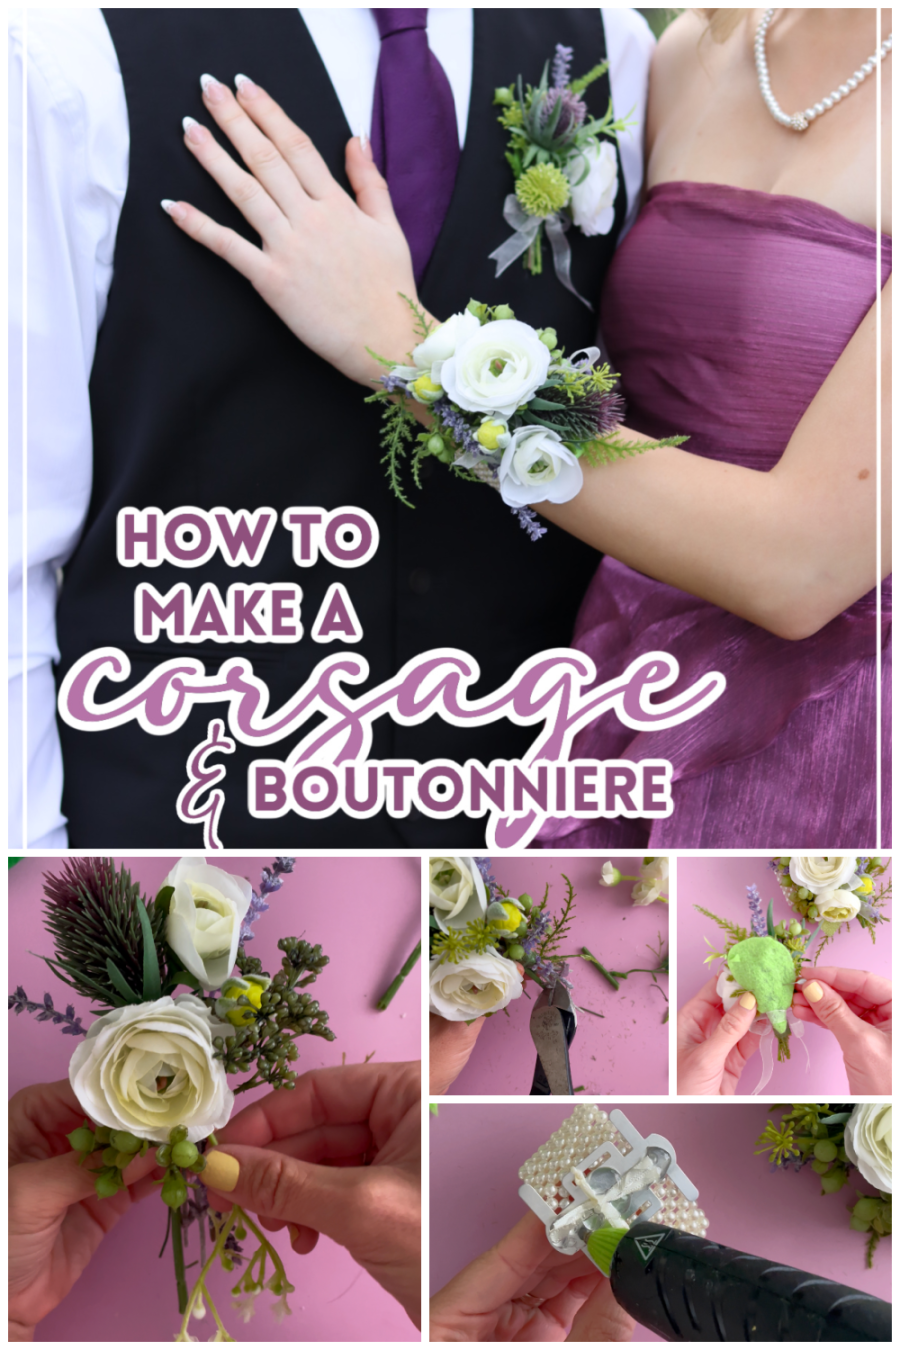
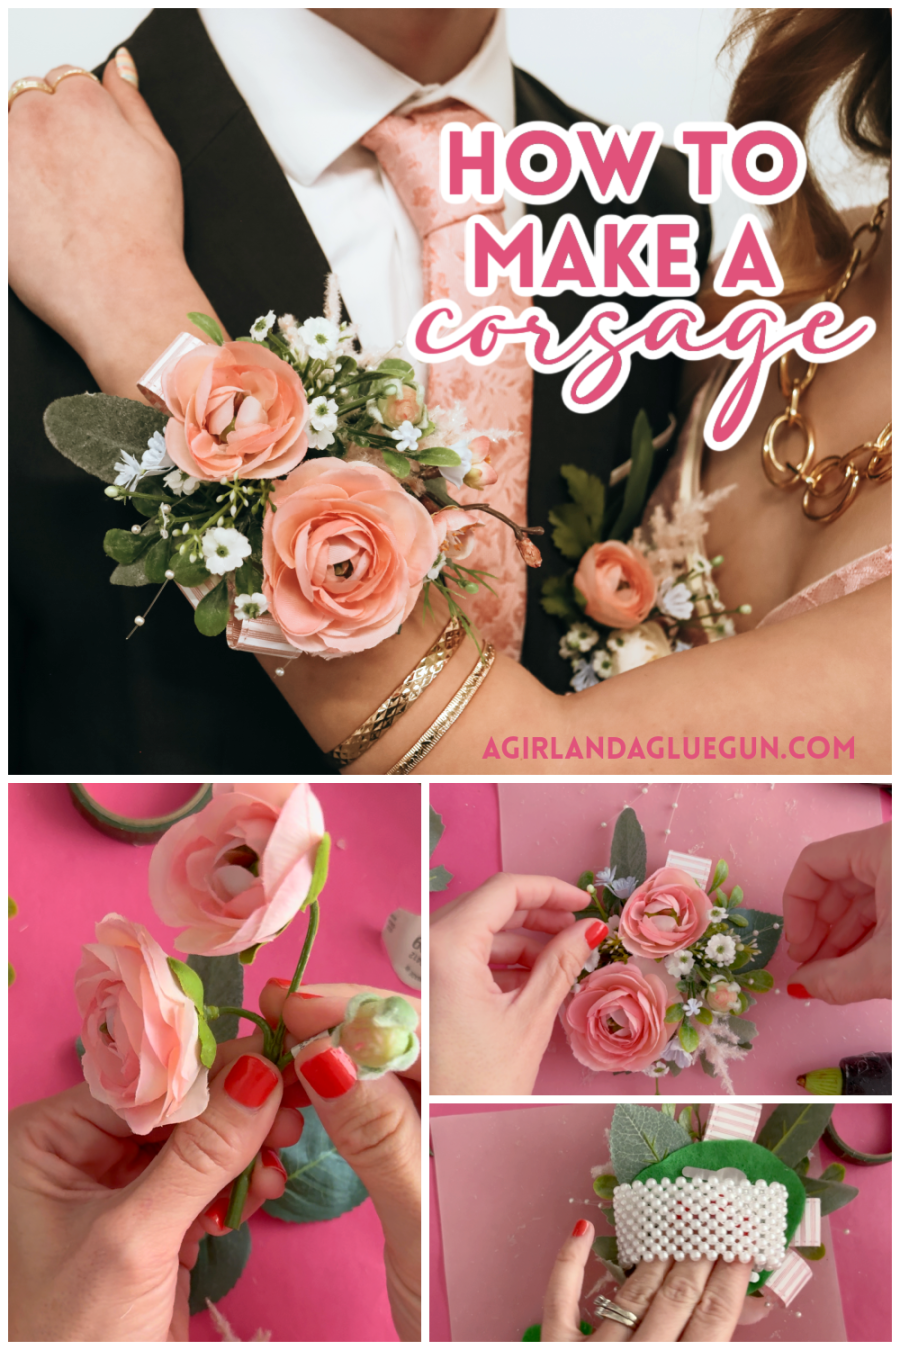
How to Make a Faux Flower Corsage
Follow these steps to create a beautiful DIY corsage with artificial flowers.
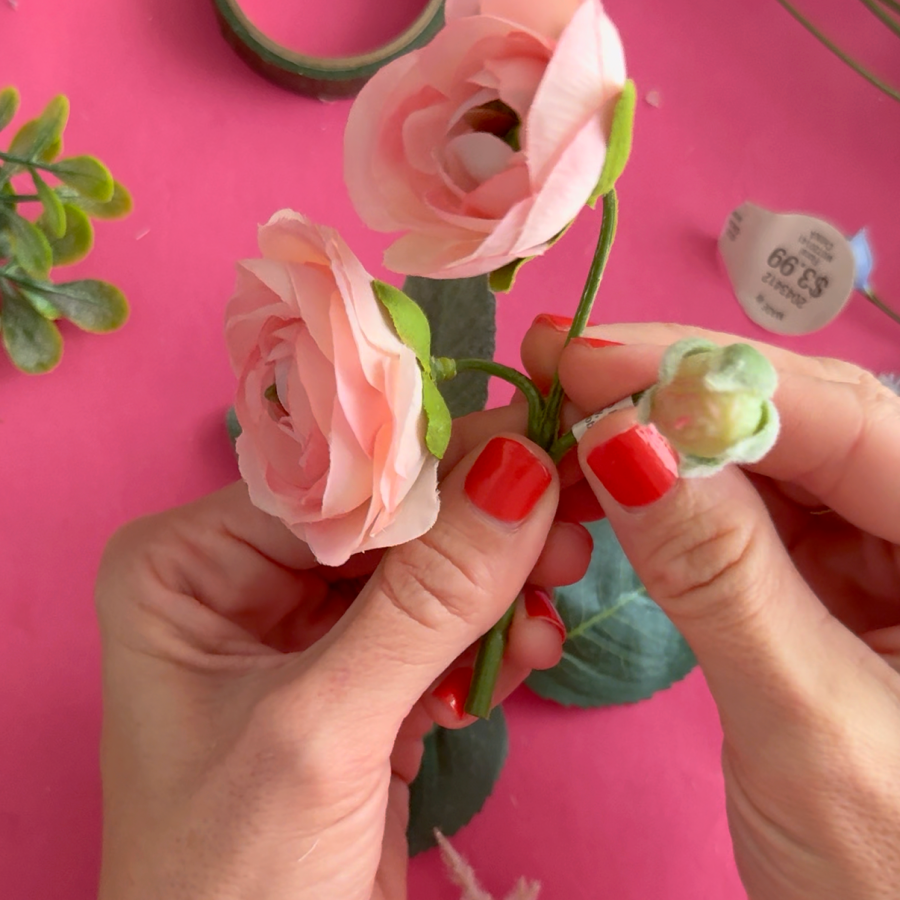
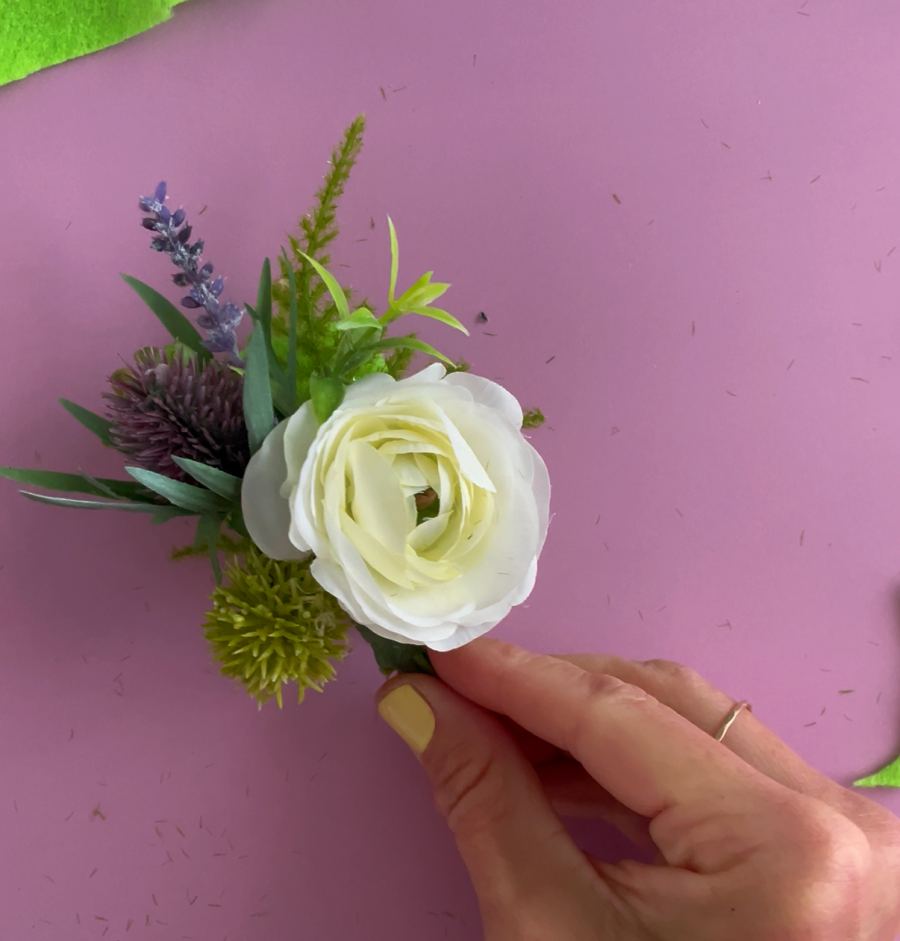
1. Choose and prep your flowers
Select one to three faux flowers for the corsage. I want a variety of sizes to make it look good. Too many flowers all the same size (both small and large) might look a bit chaotic.
I also take the flowers and curve them so they are going to sit on the wrist a little better.
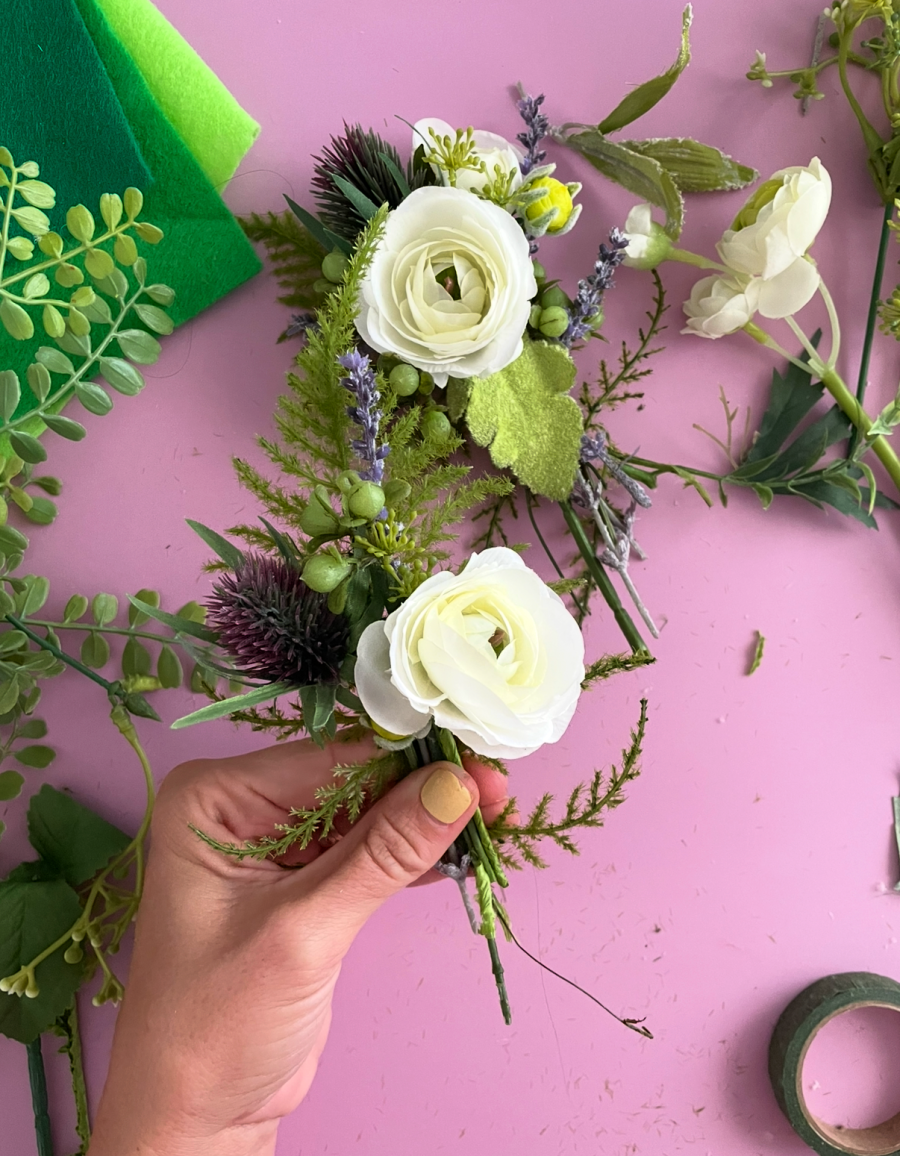
2. Arrange the flowers
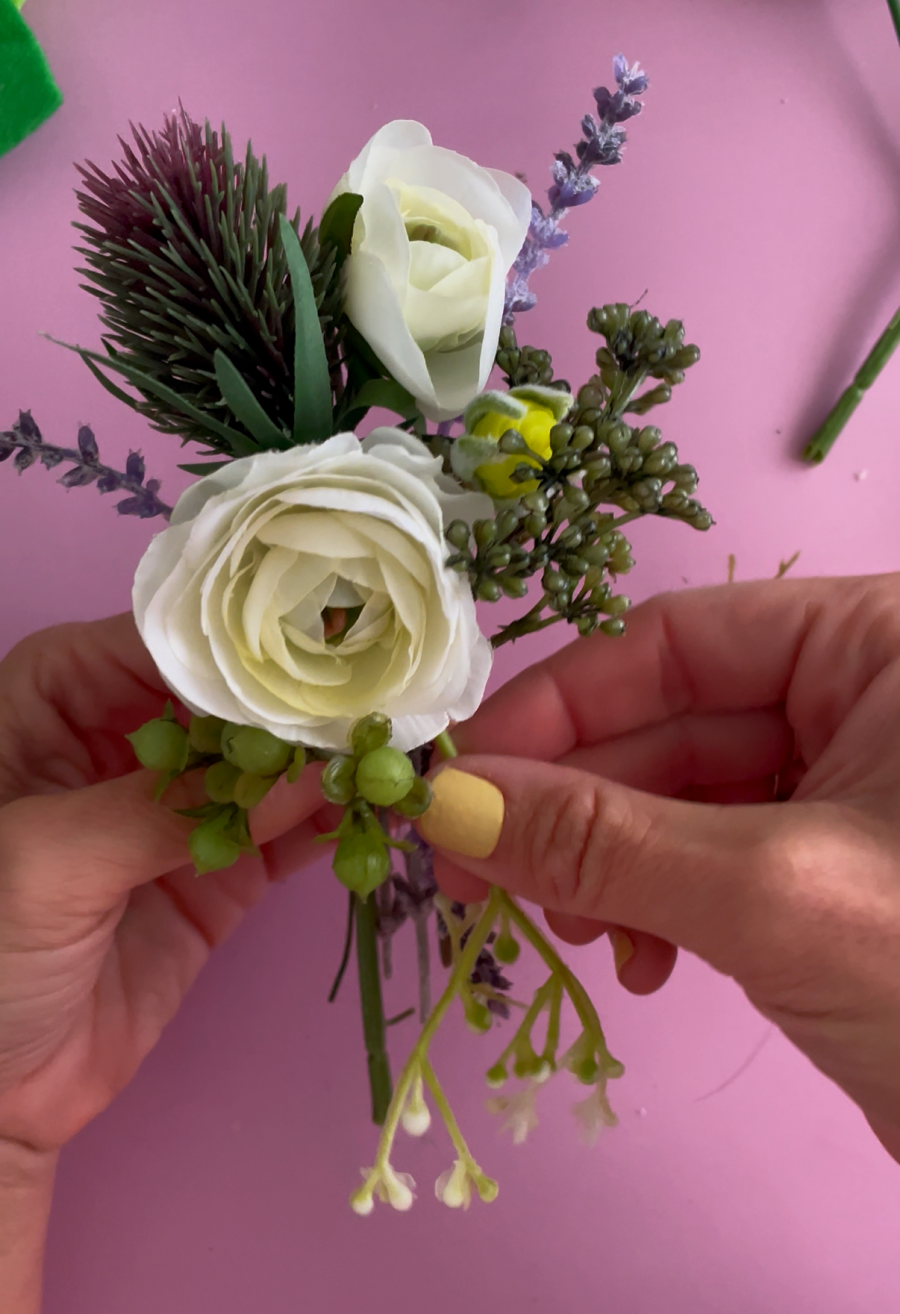
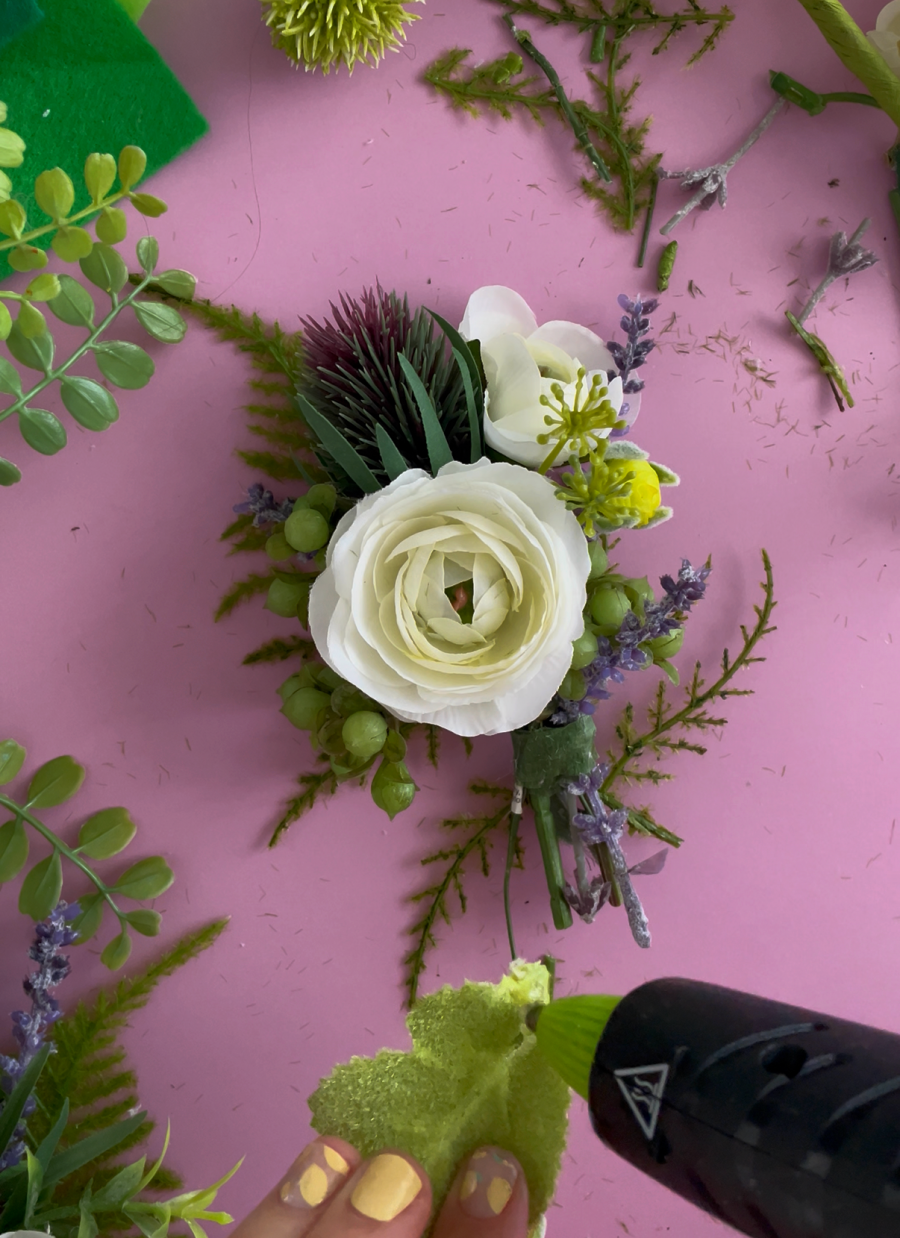
Arrange the main flowers and greenery into a small cluster. Adjust until the design looks balanced and proportional. I always start with a big green leaf stem at the back to be my base. Then add one big flower, one medium flower and even one small flower. I always start with the biggest flowers and work my way to the smallest ones.

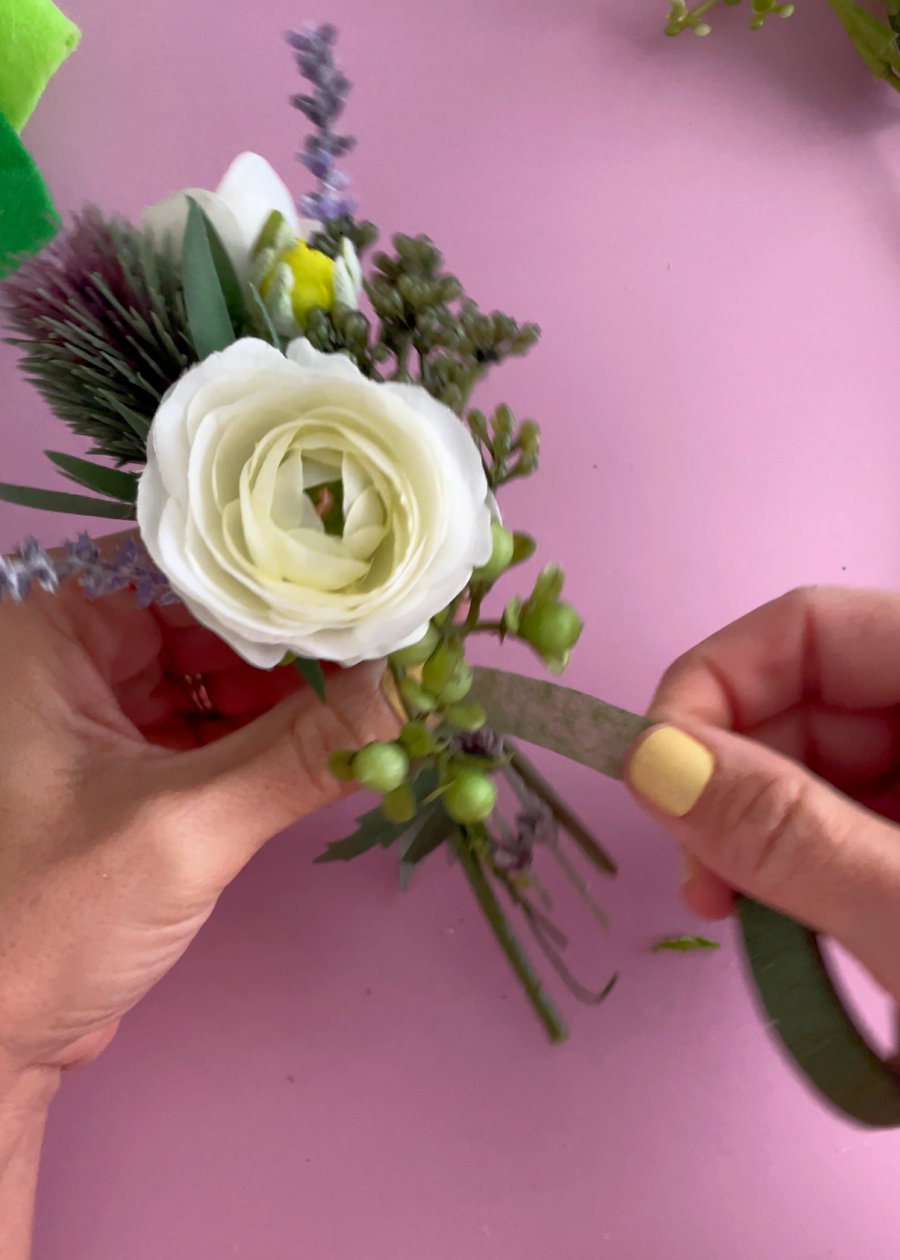
3. Secure with floral tape
Wrap floral tape tightly around the stems to hold everything together. I do this a few times as I work. The floral tape is sticky when you stretch it out and it sticks to itself. I like using it because you can easily add or take out flowers and stems as you change your mind.
4. Work big to small
Like I stated, I always start with the biggest flowers. After I have them arranged how I like, THEN I add in the smaller picks.

5. Work in an Oval
Since the corsage is sitting on the wrist, I want to make sure it looks good from all different angles. I try to work in an oval shape. Pretend there is like a center of corsage and just add flowers in from all different angles into the center spot.
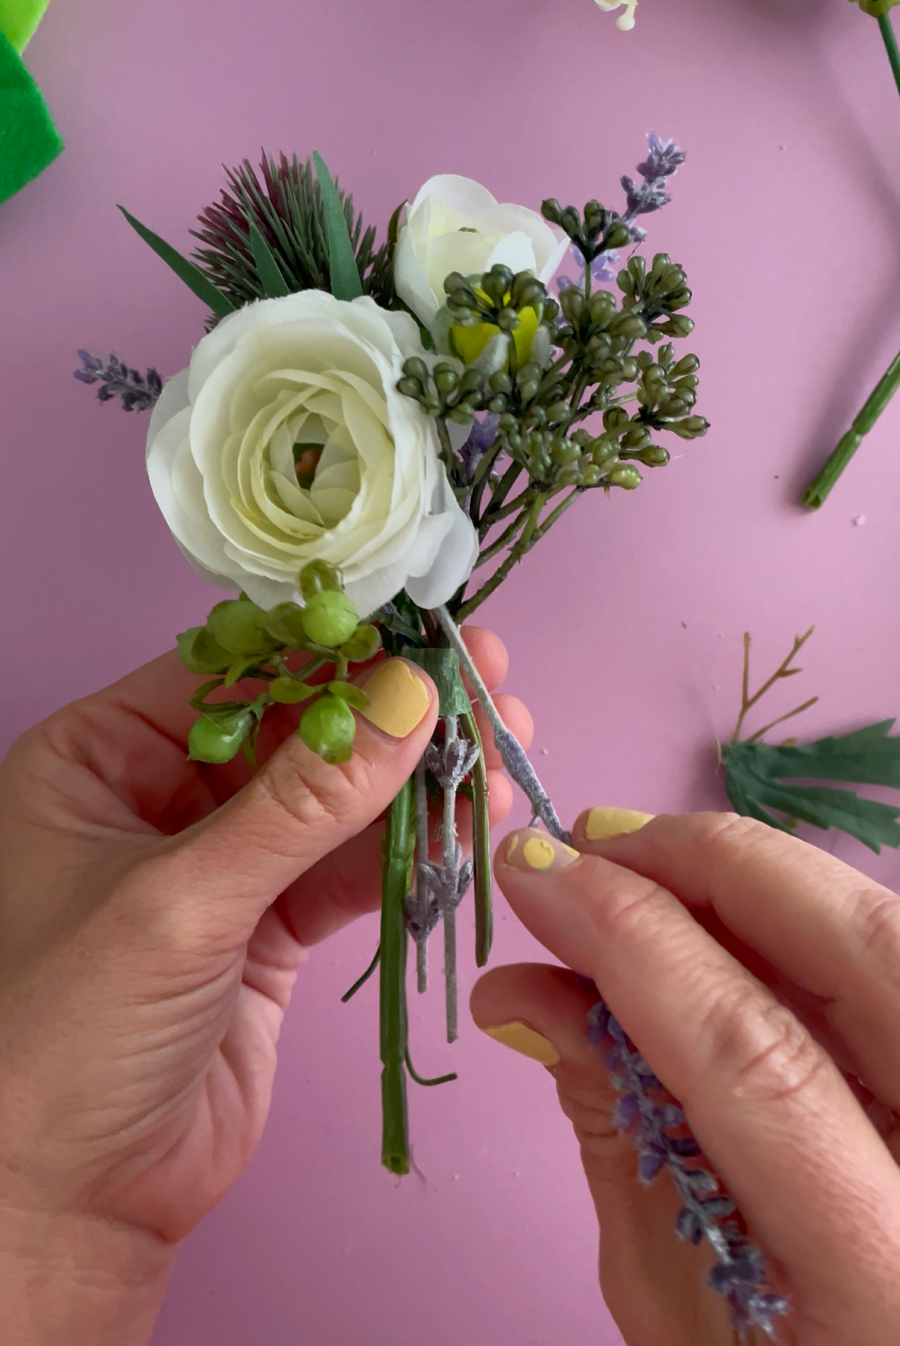
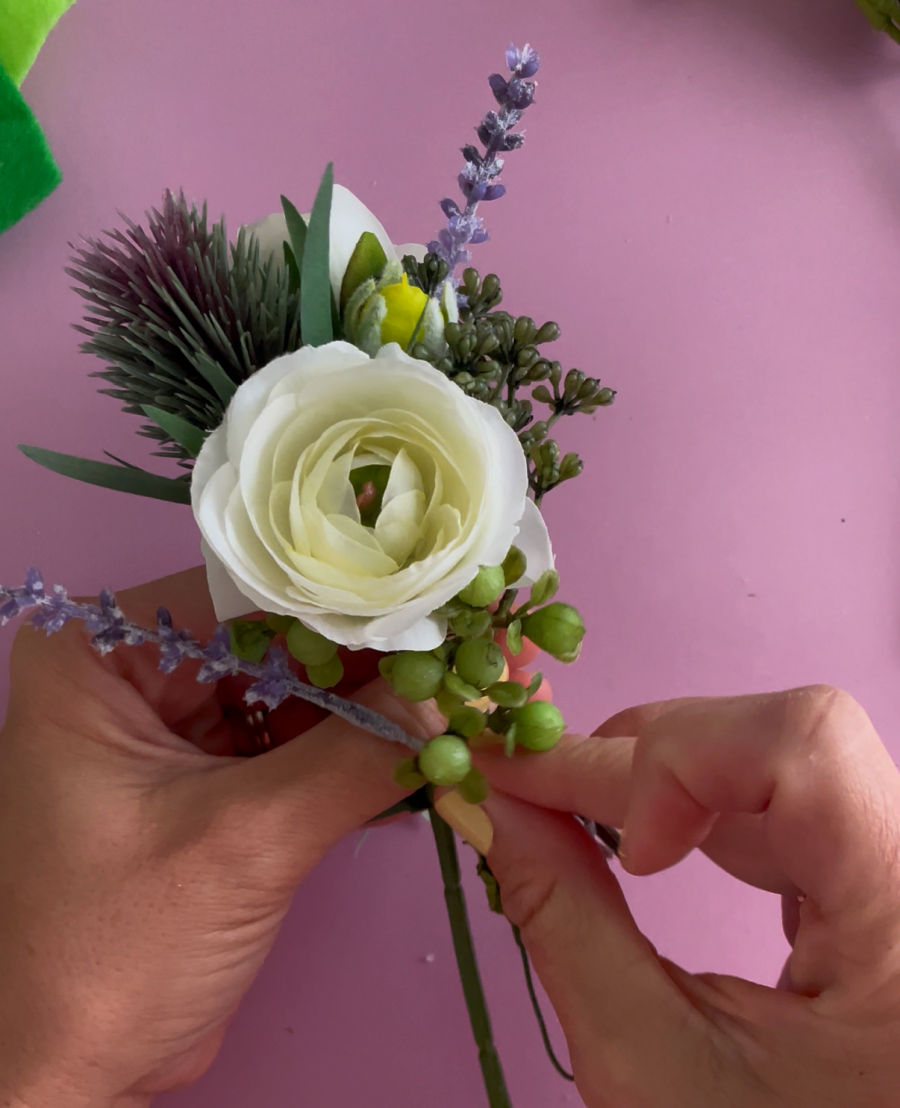
6. Wrist check
As you are adding elements, you are going to want to keep checking to make sure it a good size for your wrist. It’s easy to make it too big, too wide, or even too small! I just place it on my wrist to make sure it looks good.
6. Hot glue details
Some of the flowers are small and don’t have long enough stems to hot glue, so you can use hot glue to attach little leaves. I also use hot glue when we have little flowers that lay at bad angles. I snip them off and hot glue them so they are facing the direction I want.
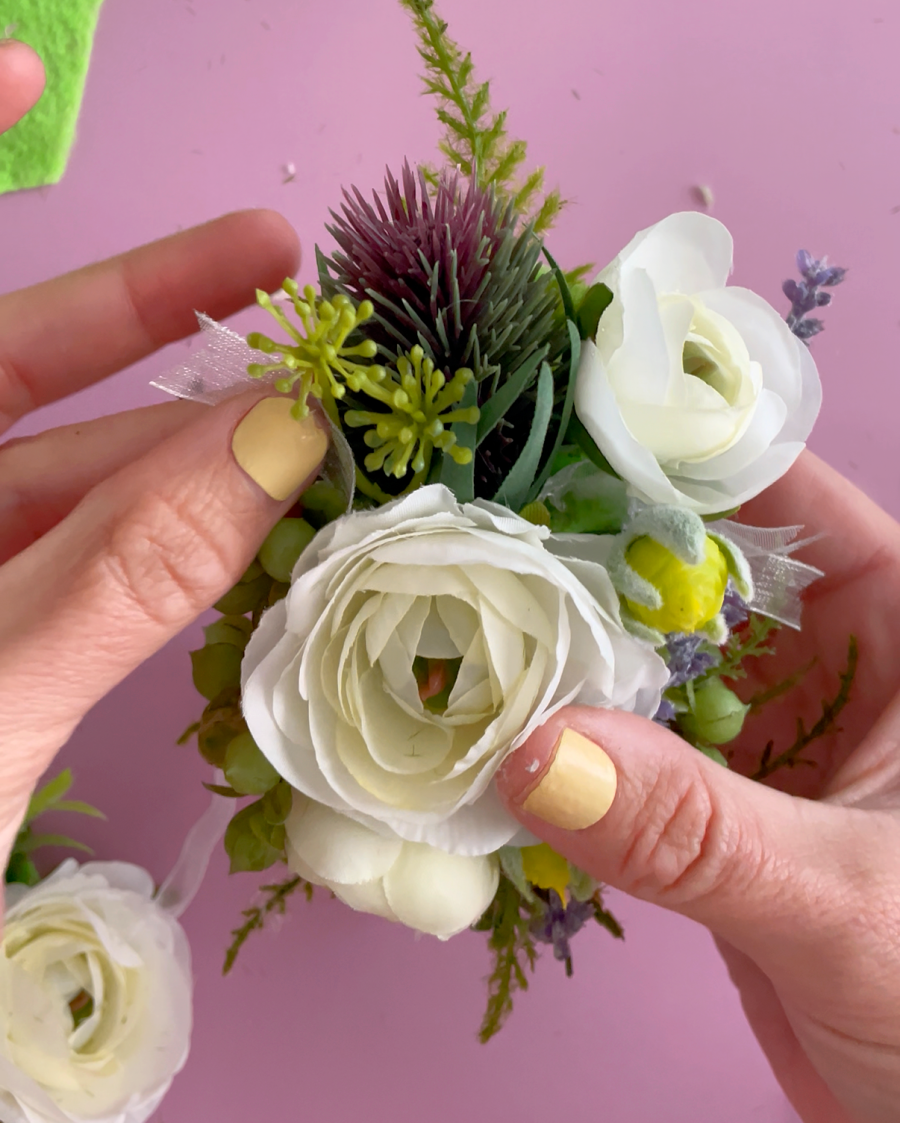
7. Add embellishments
Once you have it arranged, you can add in little pearls, diamonds, feathers, and ribbons. I use these to fill in any sections that look sparse. This part is totally optional! Sometimes I don’t use any embellishments at all!
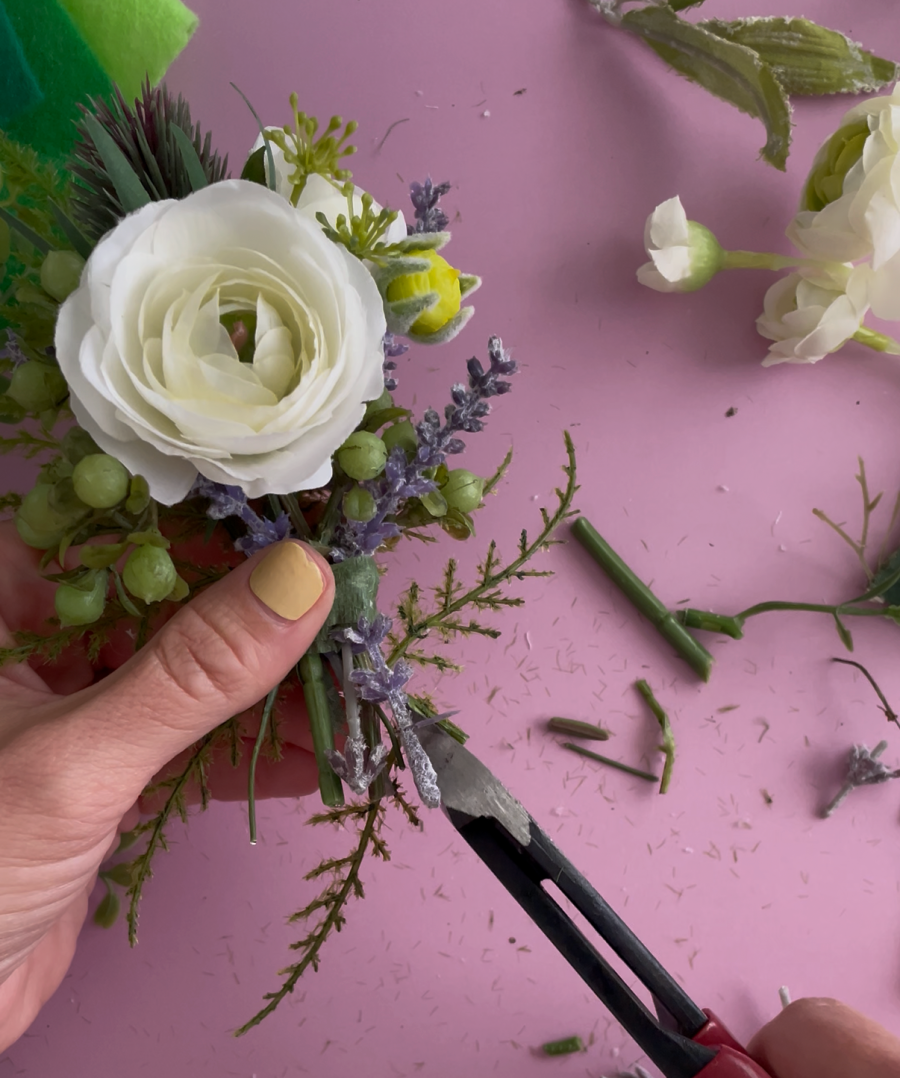
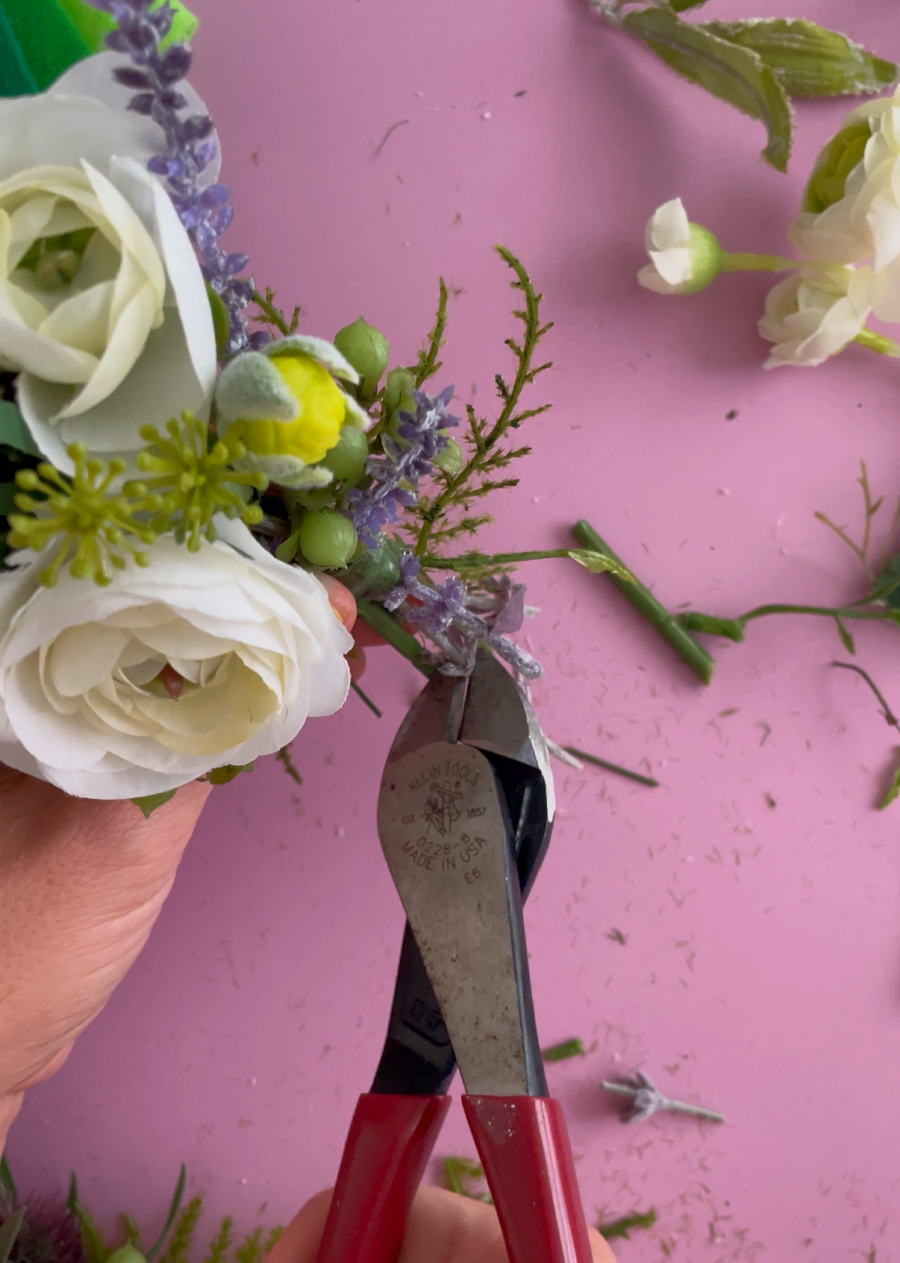
8. Trim corsage
I use snipping shears as I go, but I never want to go too short just in case. So once I have it arranged how I like, I trim off any pieces that are sticking out.
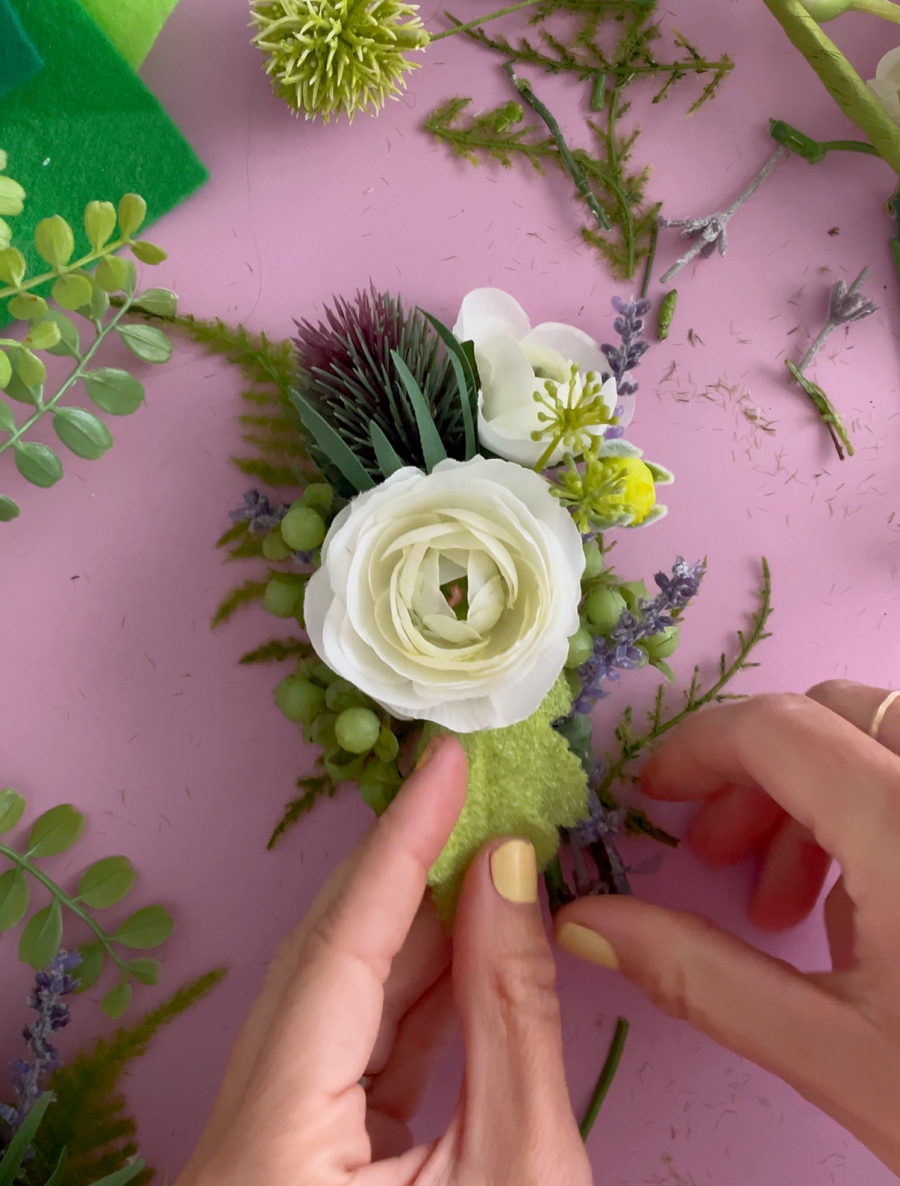
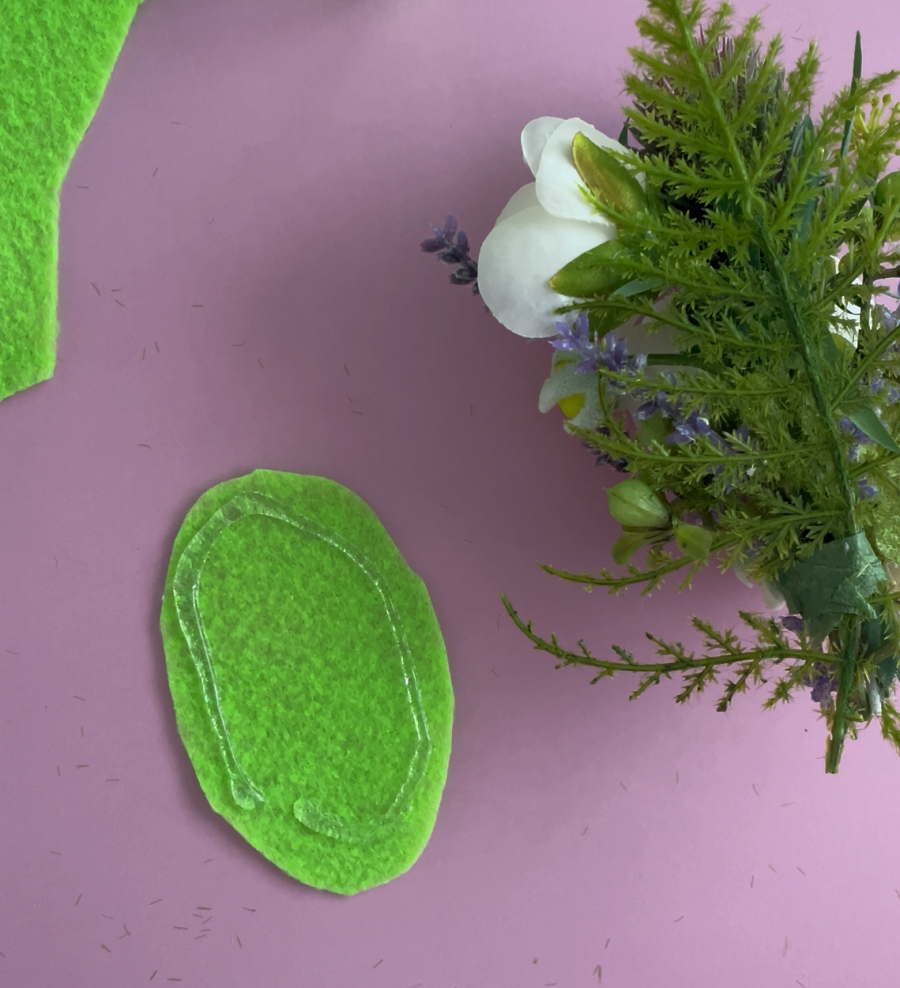
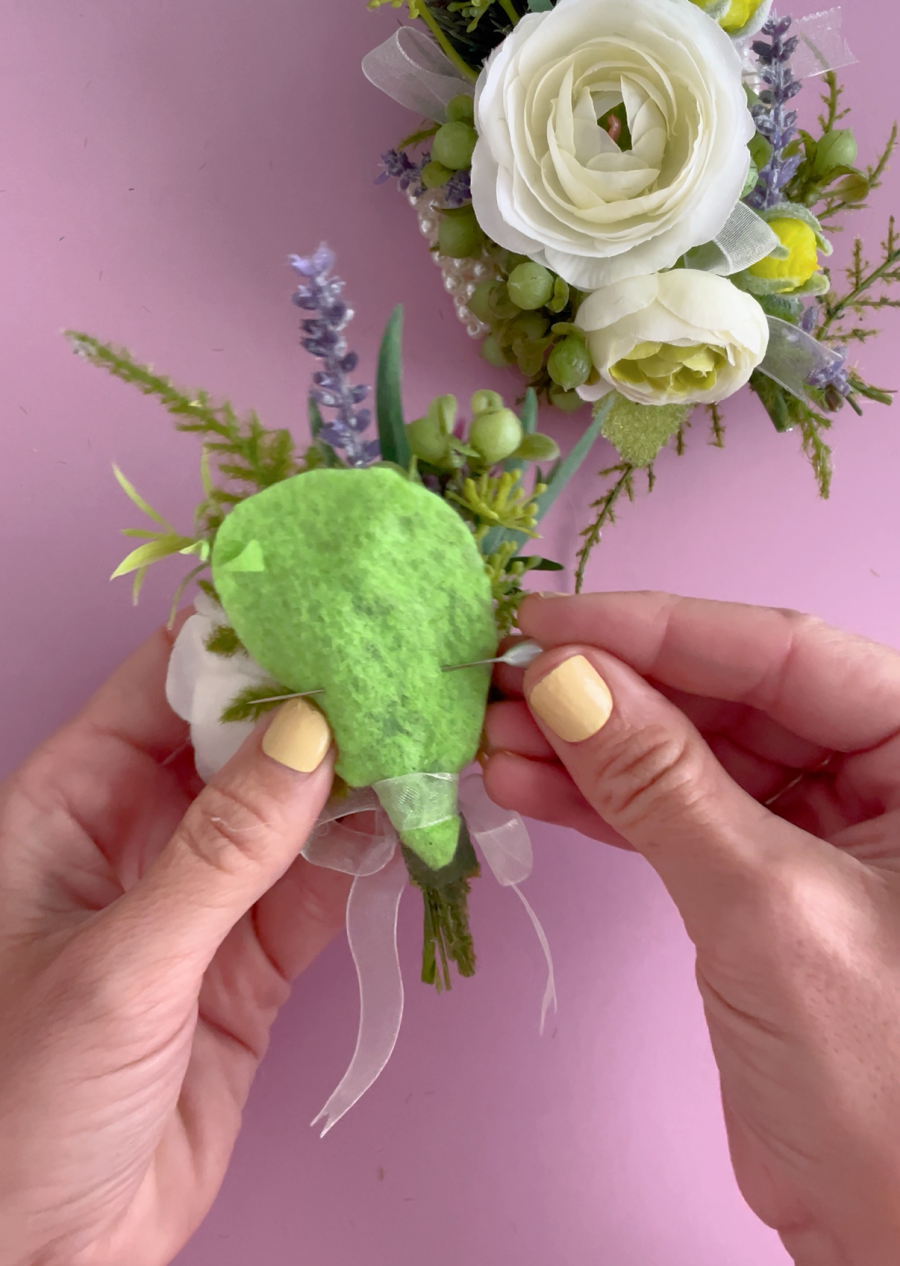
9. Attach the wrist band
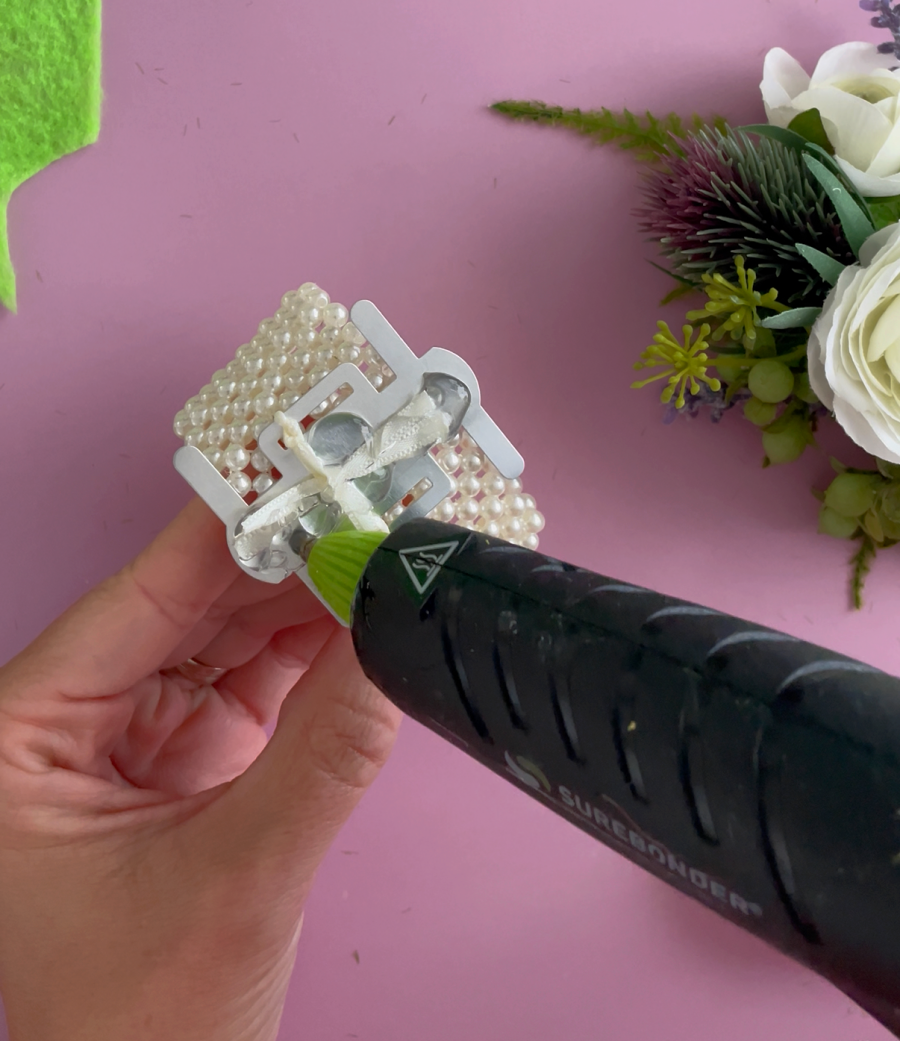
I take the green felt and cut a backing to fit the back of the corsage. This serves two purposes. It gives me something to hot glue the wrist band too, AND it makes the corsage soft so nothing scratches or irritates the wrist!

Hot glue it to the back and press to attach all the flowers and greenery. Then take the wristband and attach it to the felt. Make sure you are hot gluing in on in the right direction!
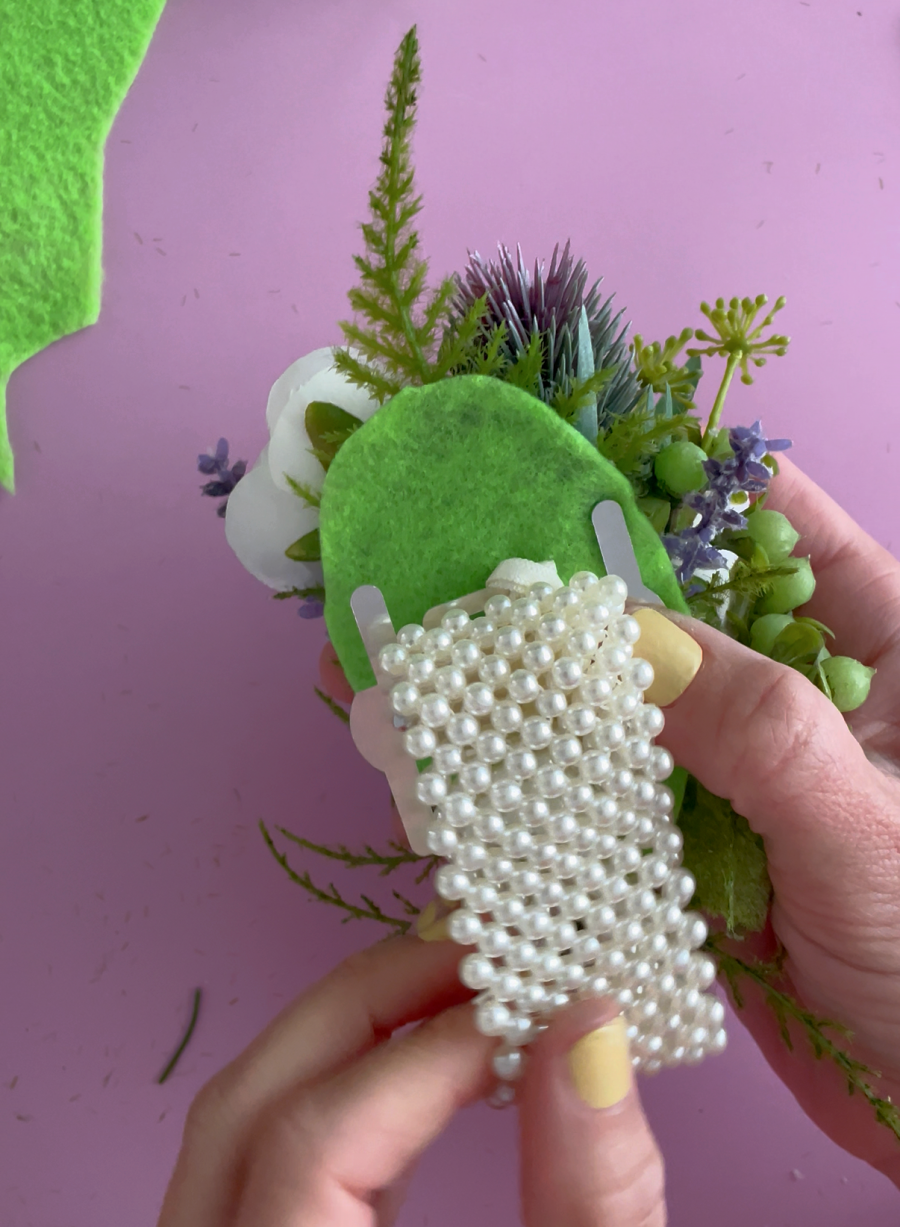
Once it’s cooled, you have a gorgeous corsage!
How to Make a Faux Flower Boutonniere
Boutonnieres are even simpler and quick to make. I make them after the corsage because I use the same flowers to make them look cohesive together! It’s very similar to the technique above!
1. Select your flower
Choose one main faux flower and a small piece of greenery.
2. Trim and arrange
Arrange until you like what you have.
3. Wire and tape
Secure the stems together with floral tape.
4. Add in small flowers and picks
Using the same little picks you used in your corsage, incorporating them into the main flower.
4. Trim
I like to trim the bottom stems to
5. Finish with ribbon
Wrap ribbon around the stem base and secure with glue or tape.
6. Attach the pin or magnet
Add a boutonniere pin or magnetic backing to the back for easy wearing. If the back doesn’t look clean, or if the flowers feel unsteady, you can add a piece of felt with hot glue.
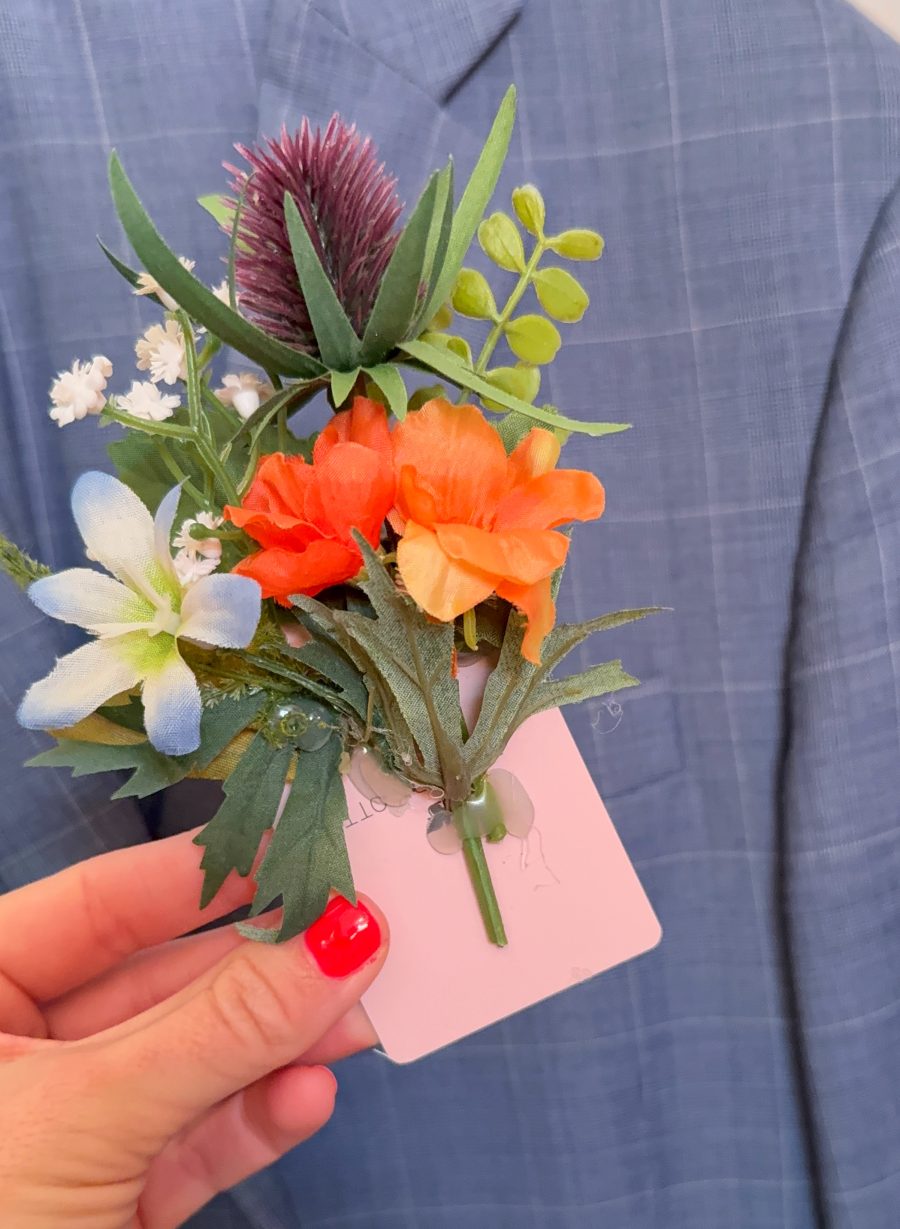
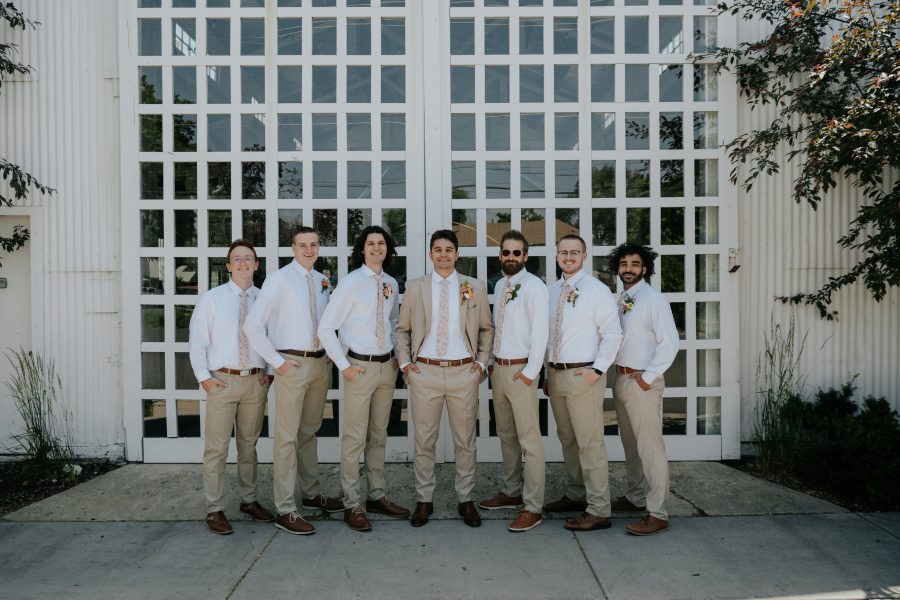
Another alternative is to hot glue the flowers to a card. (old plastic gift cards or room keys). Then it can easily slip into a pocket. We made a few of these as options for my daughter’s wedding. Not every shirt or jacket has a pocket though so double check before you go this route.

Tips for Making Corsages and Boutonnieres Look Professional
- Keep designs simple and scaled appropriately
- Use odd numbers of flowers for balance
- Match ribbon colors to event outfits
- Choose lightweight faux flowers for comfort
- Test pins or magnets before the event
I purchased a set of 8 clear boxes in the baker’s section at the craft store to put the flowers in so they look professional for the date.
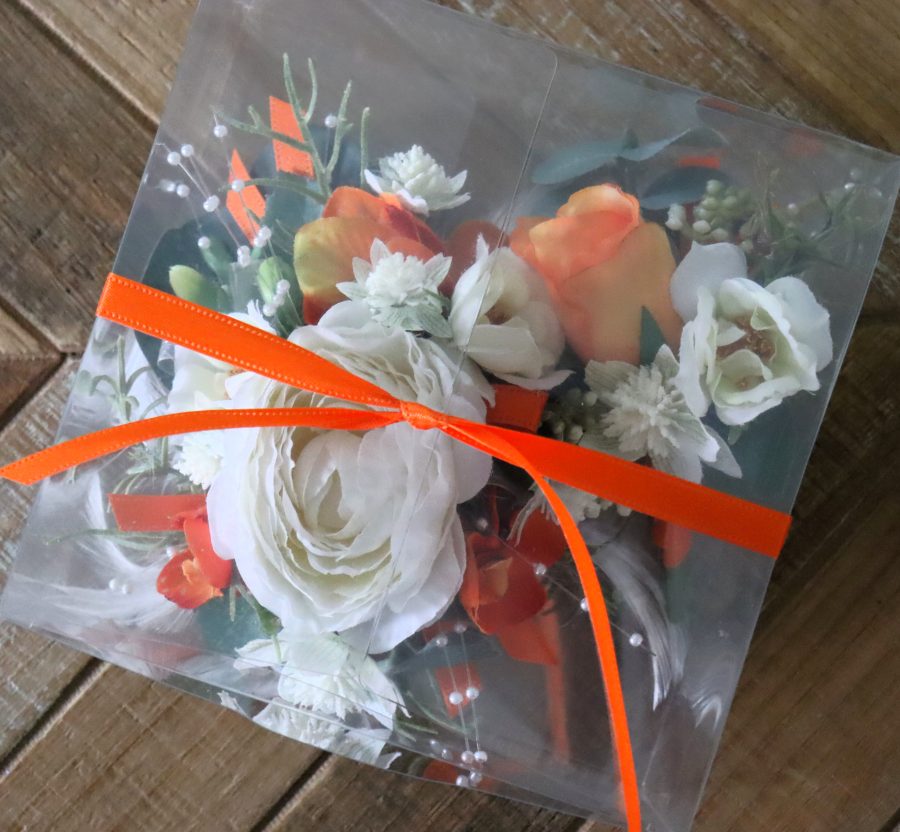
I also save any cute little boxes to put them in!

When to Use Faux Flower Corsages and Boutonnieres
DIY faux corsages and boutonnieres are perfect for:
- Prom and homecoming
- Weddings and bridal parties
- School dances
- Mother’s Day or special celebrations
- Keepsake or memory displays
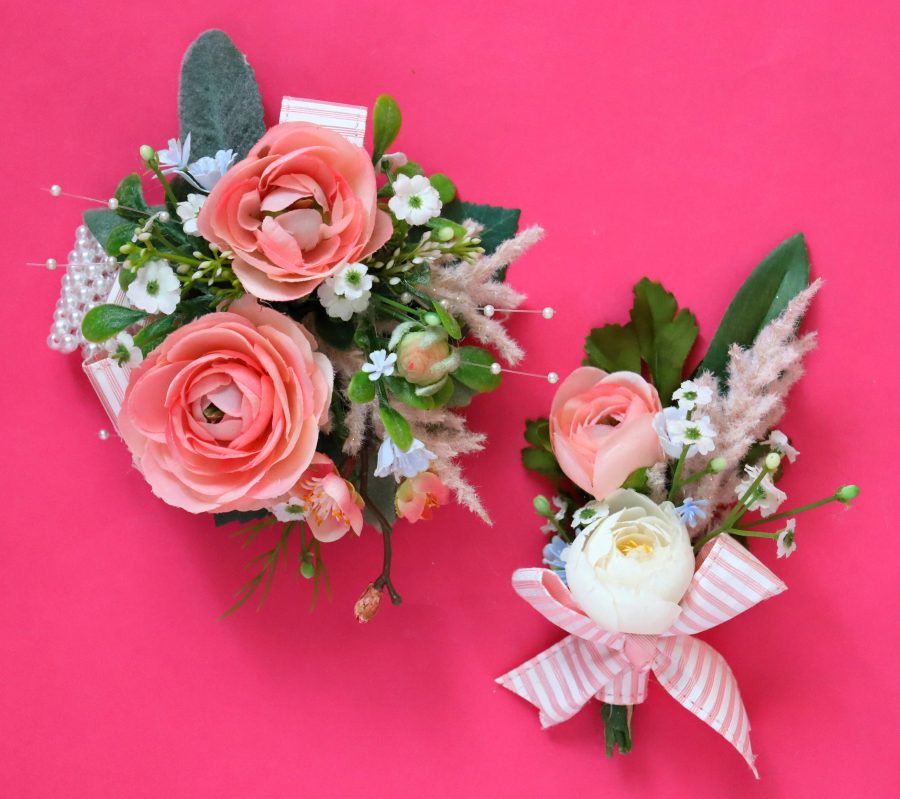
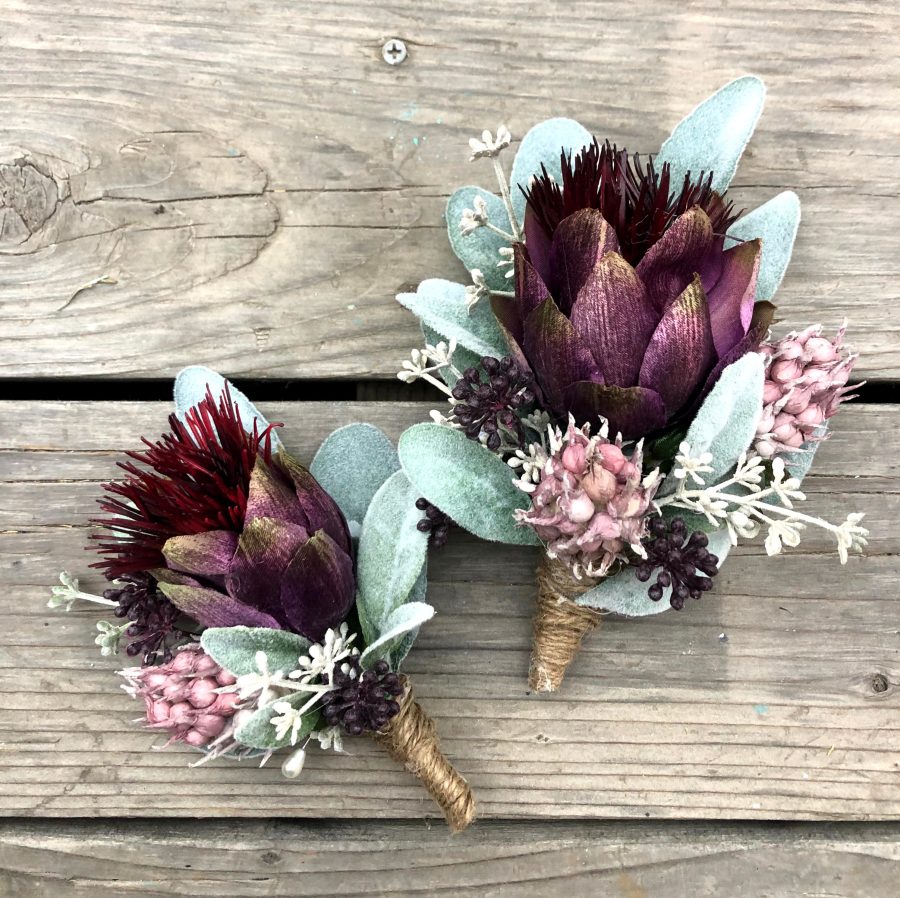
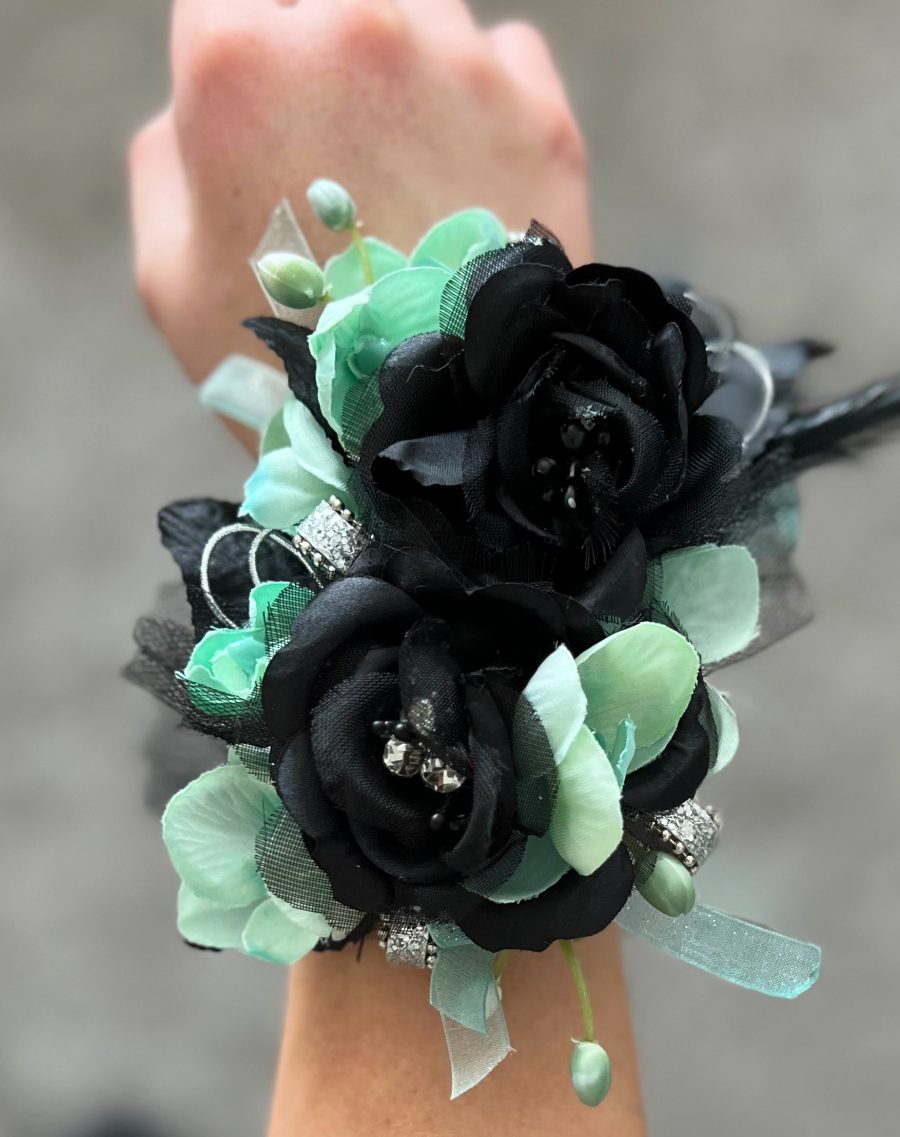
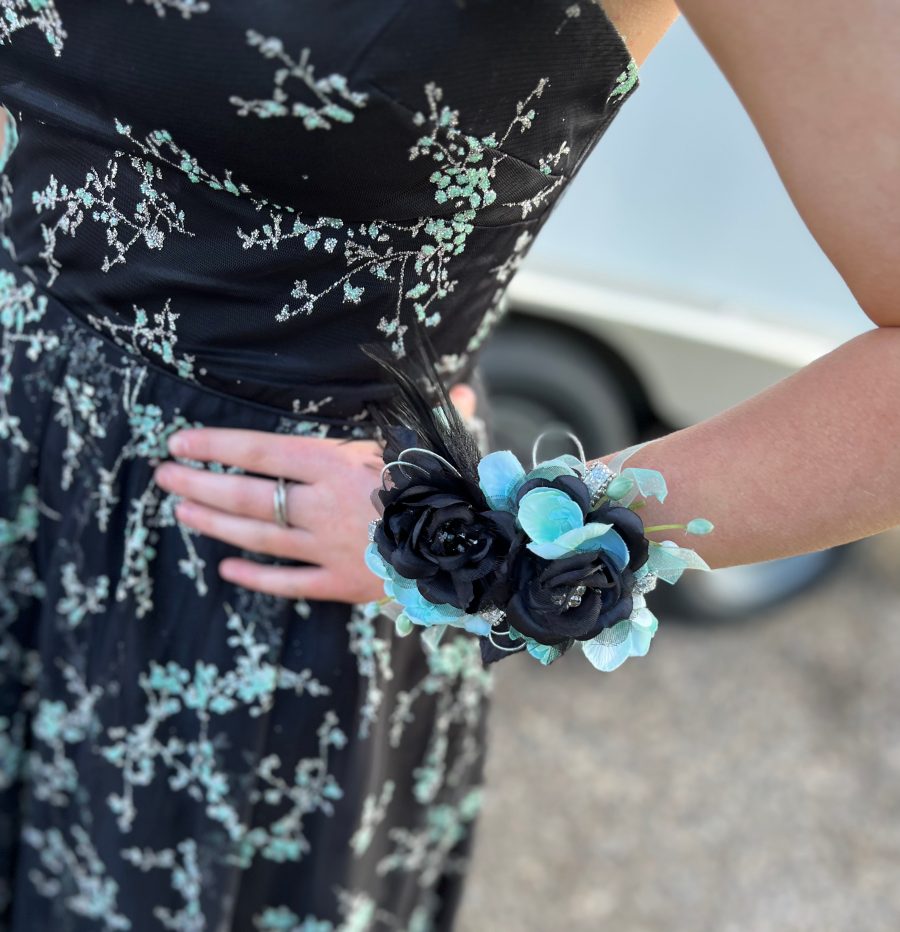
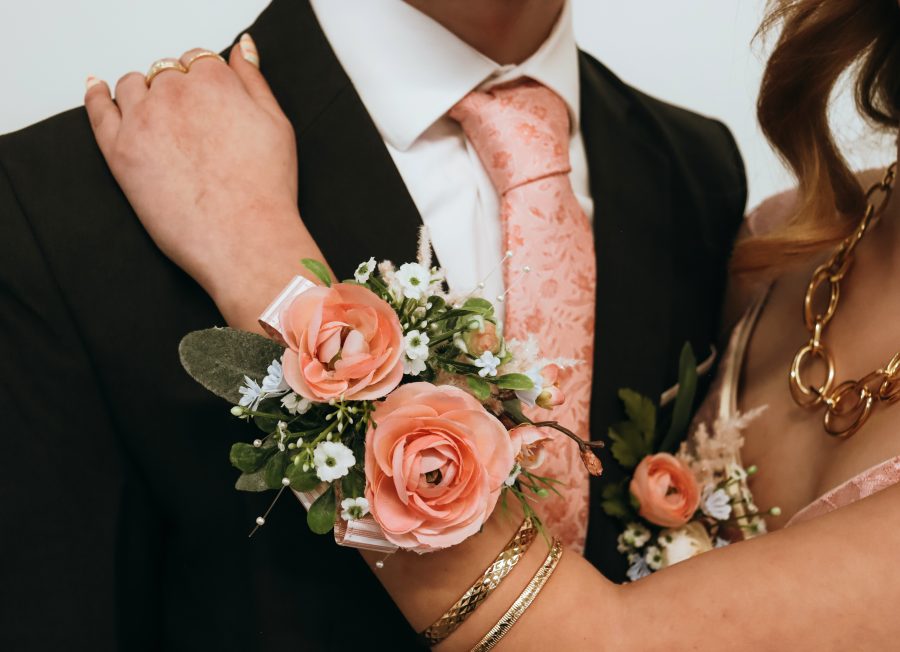
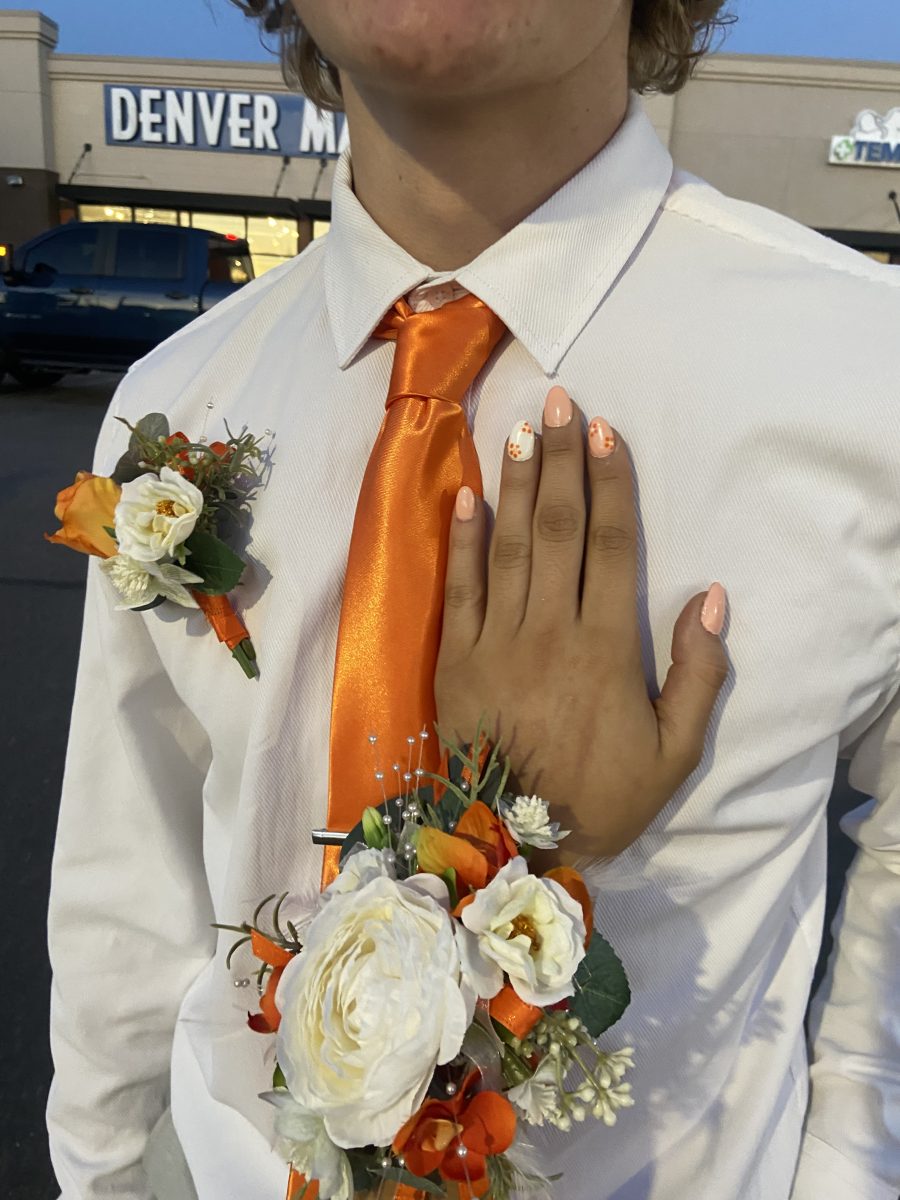
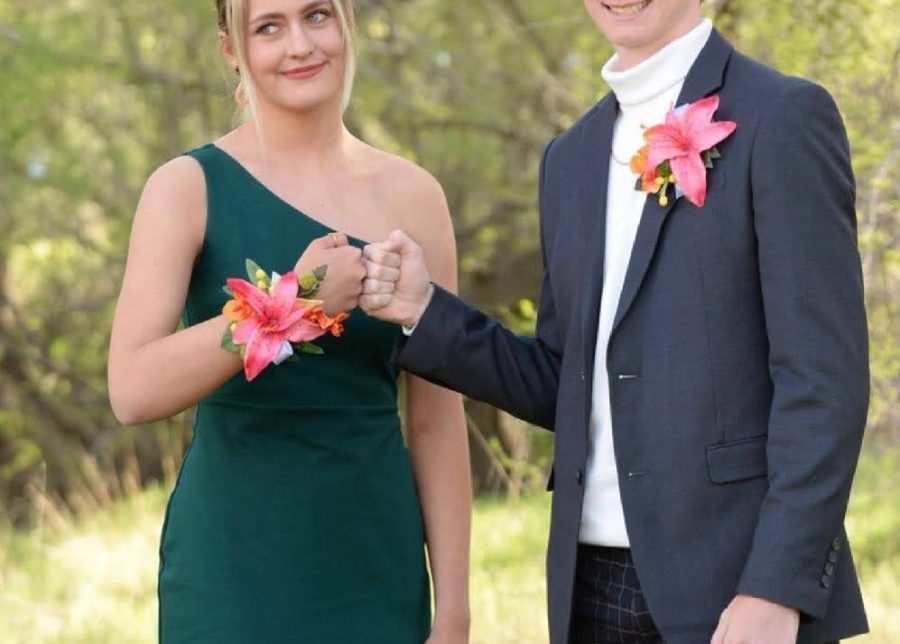
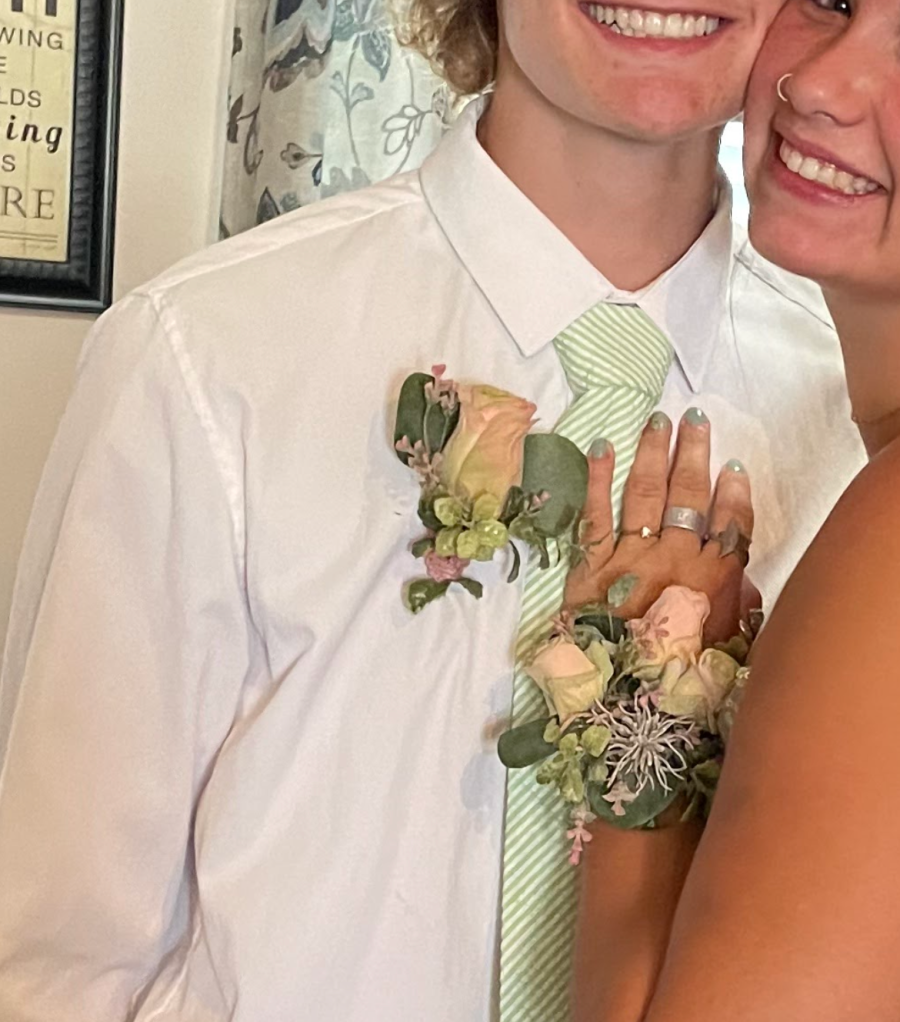
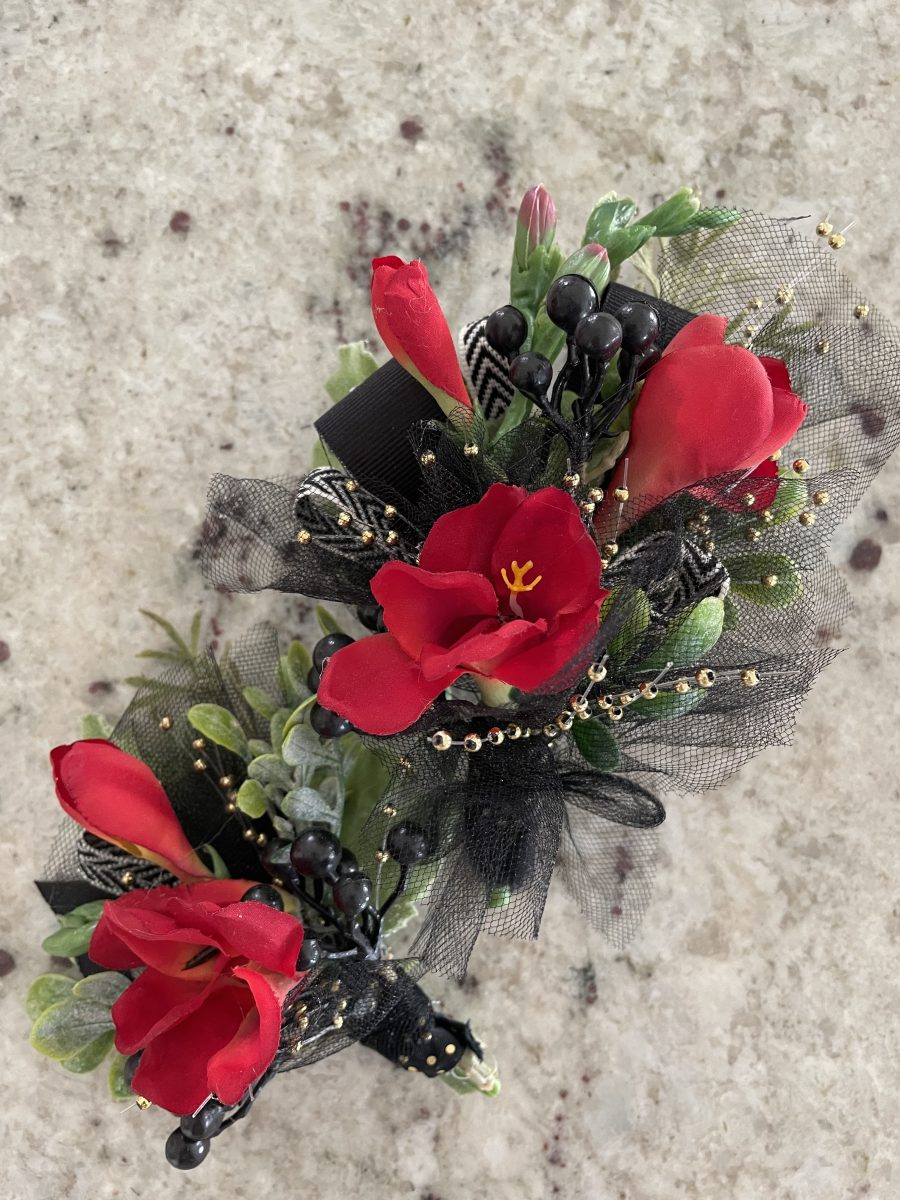
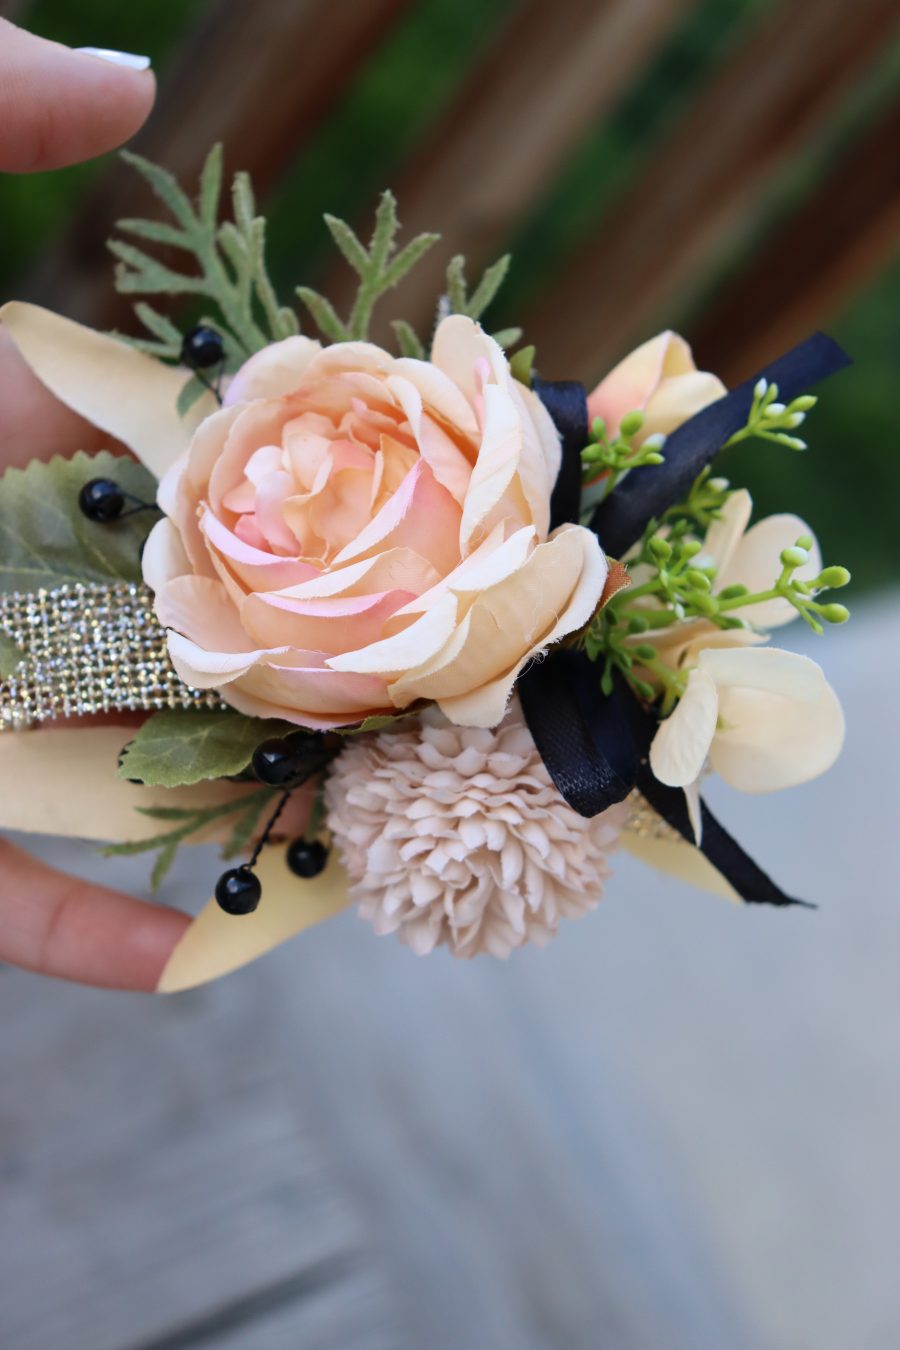
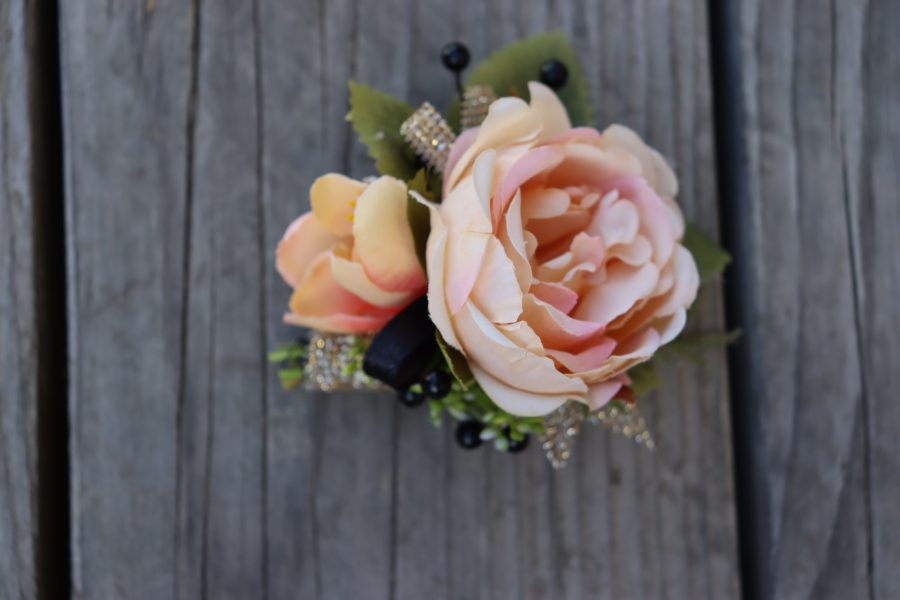
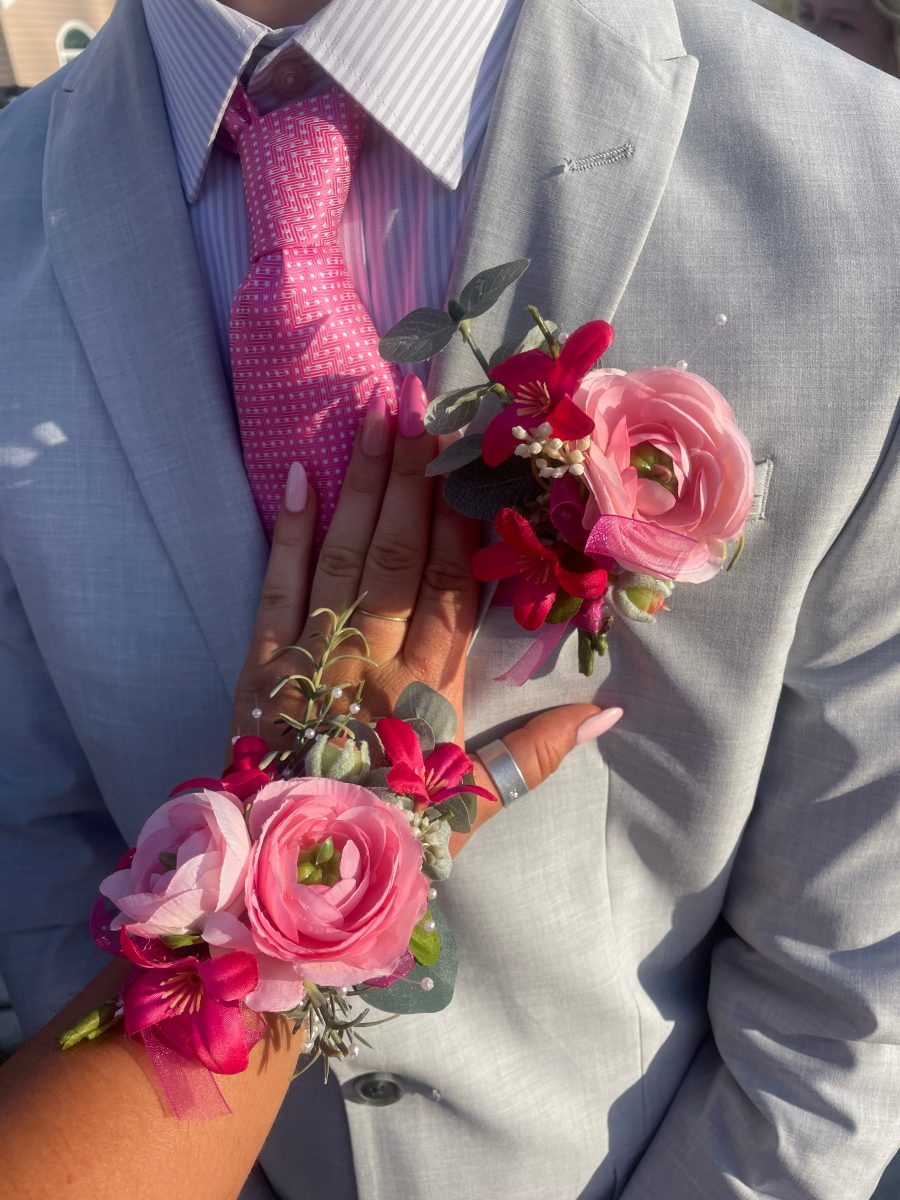
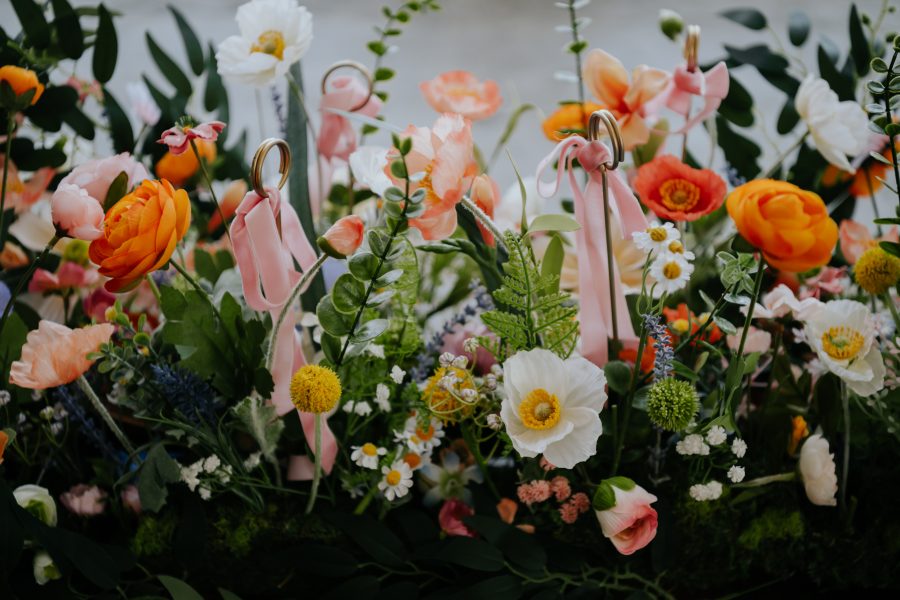
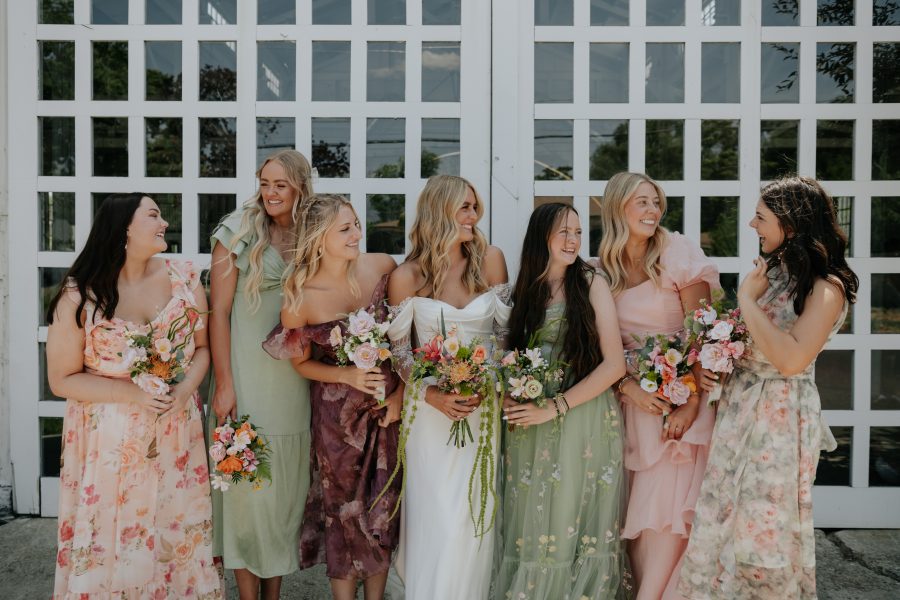
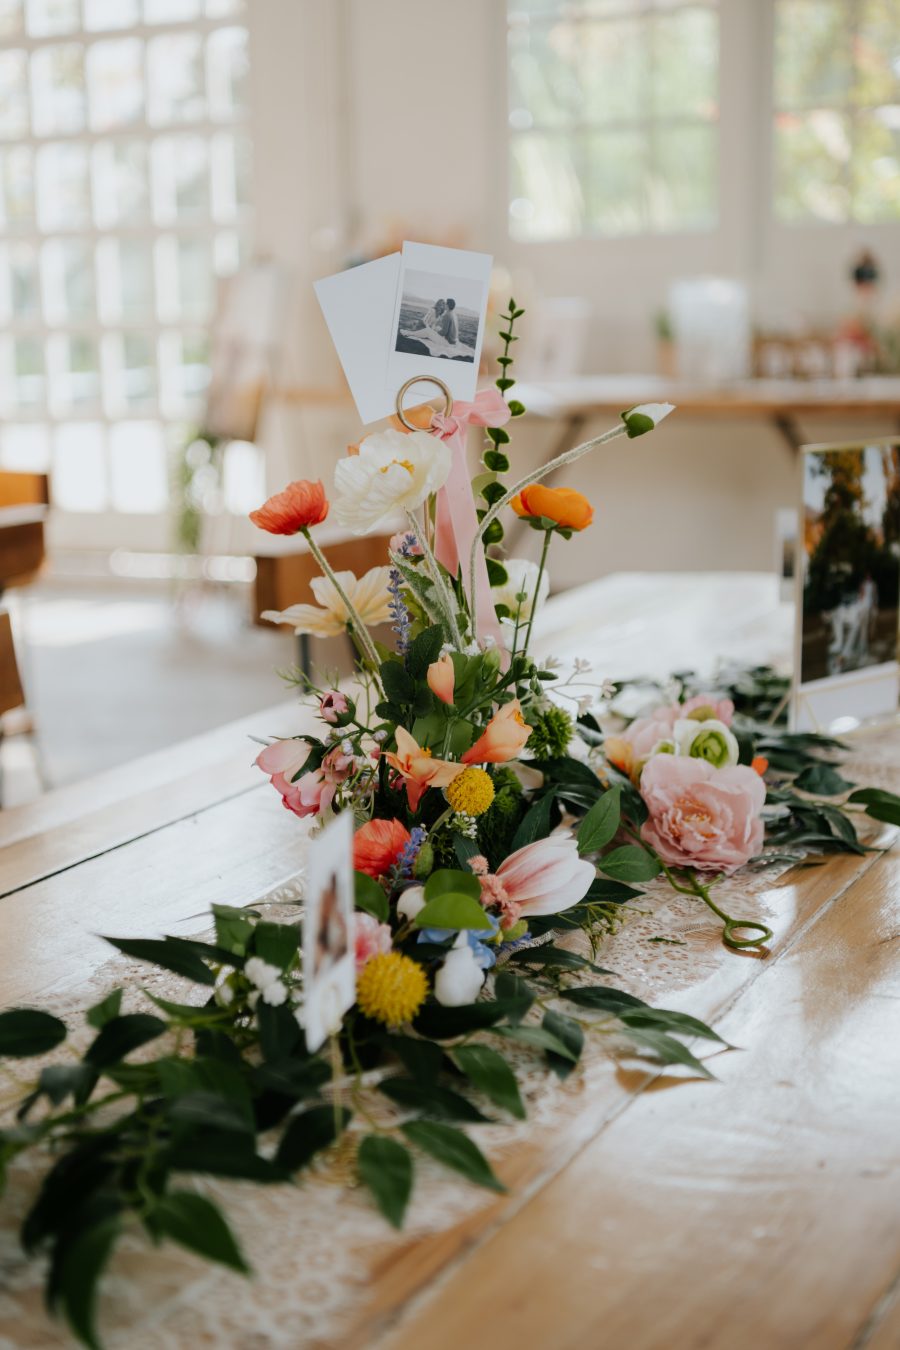
Corsage inspiration!
Now is the time where I’m going to show you some of the ones I have created! These are just the ones I remembered to take photos of.

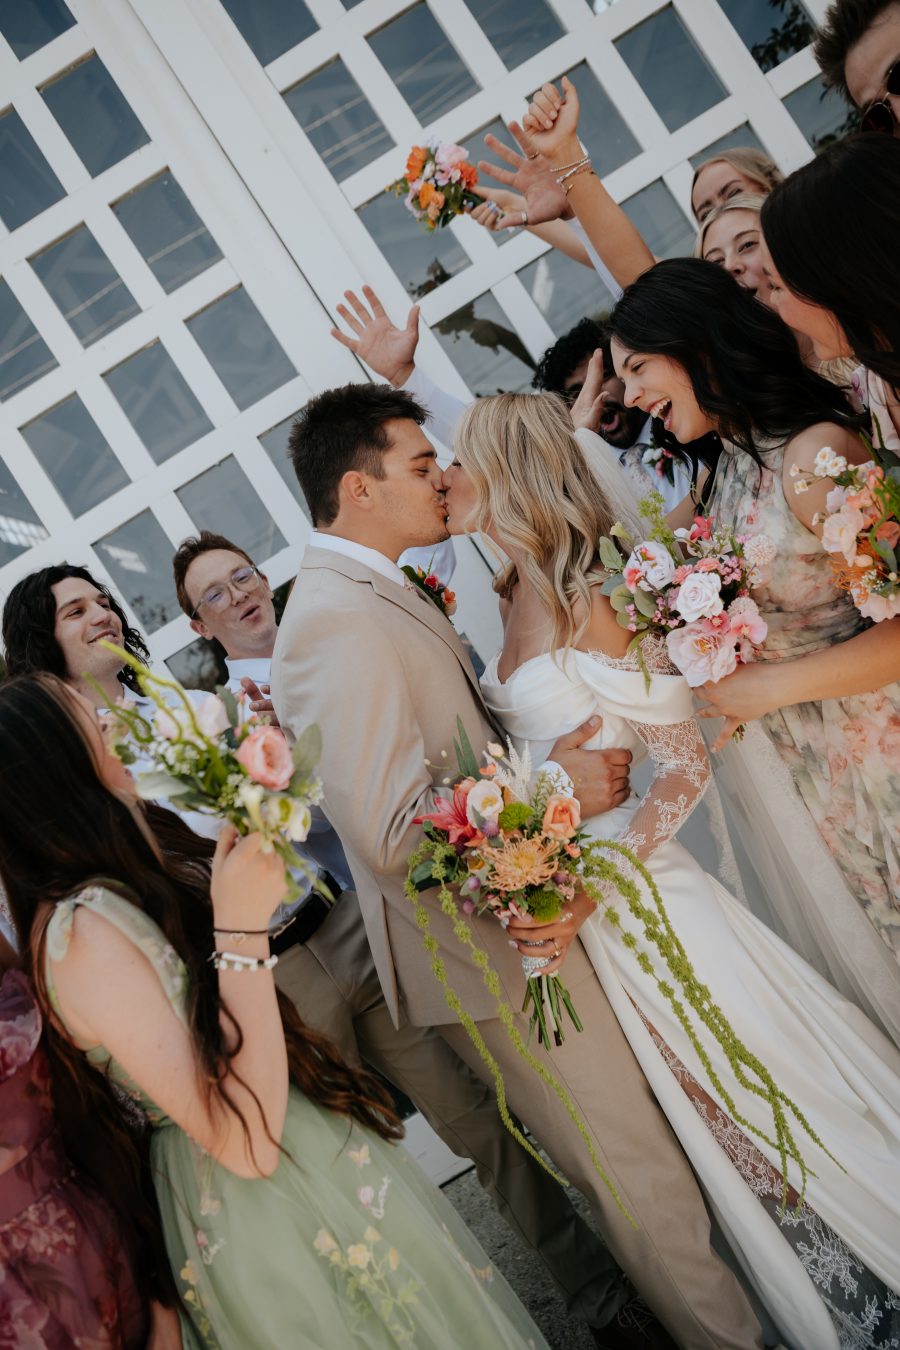
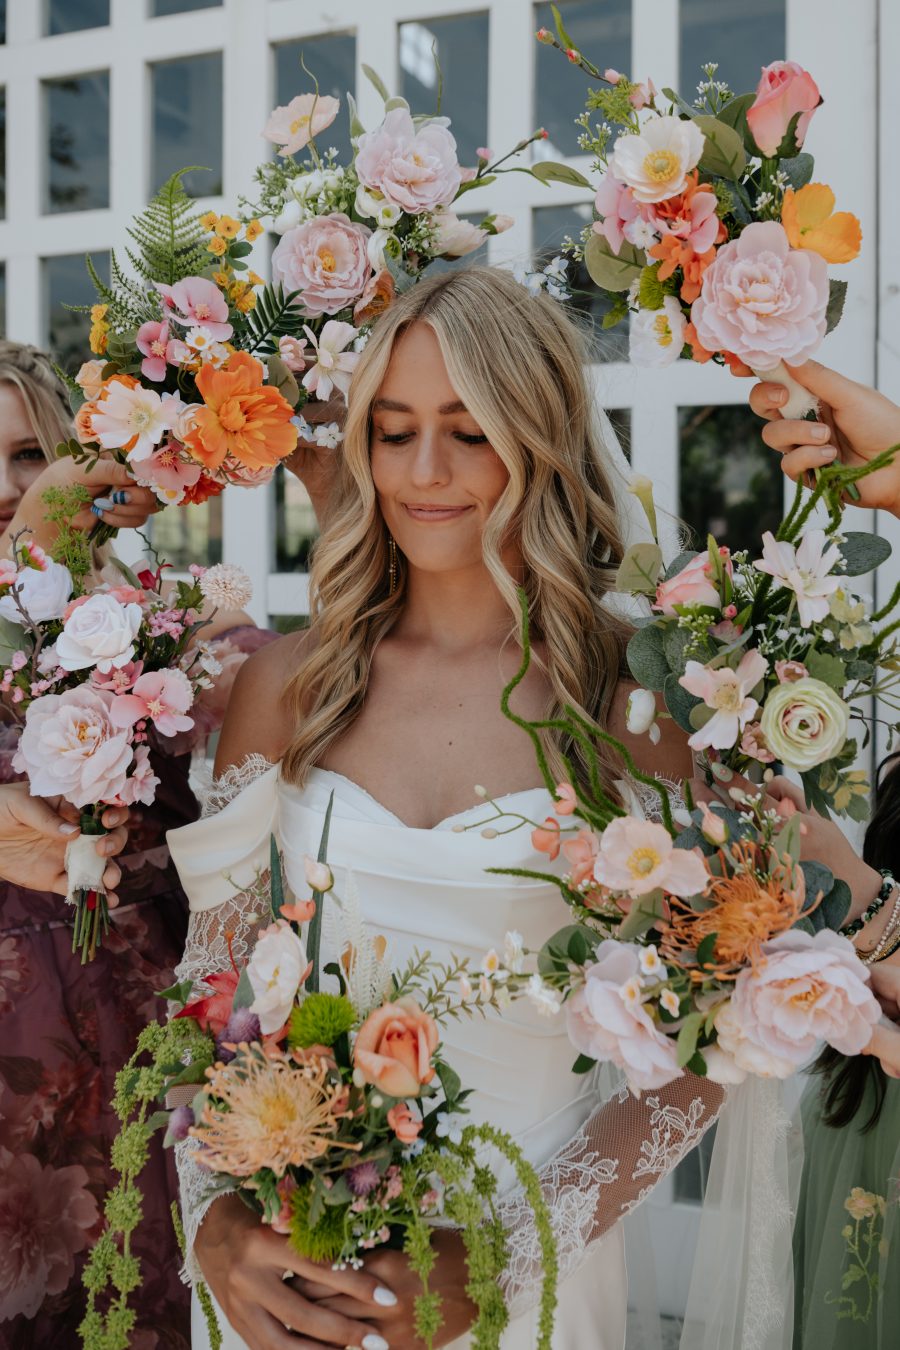
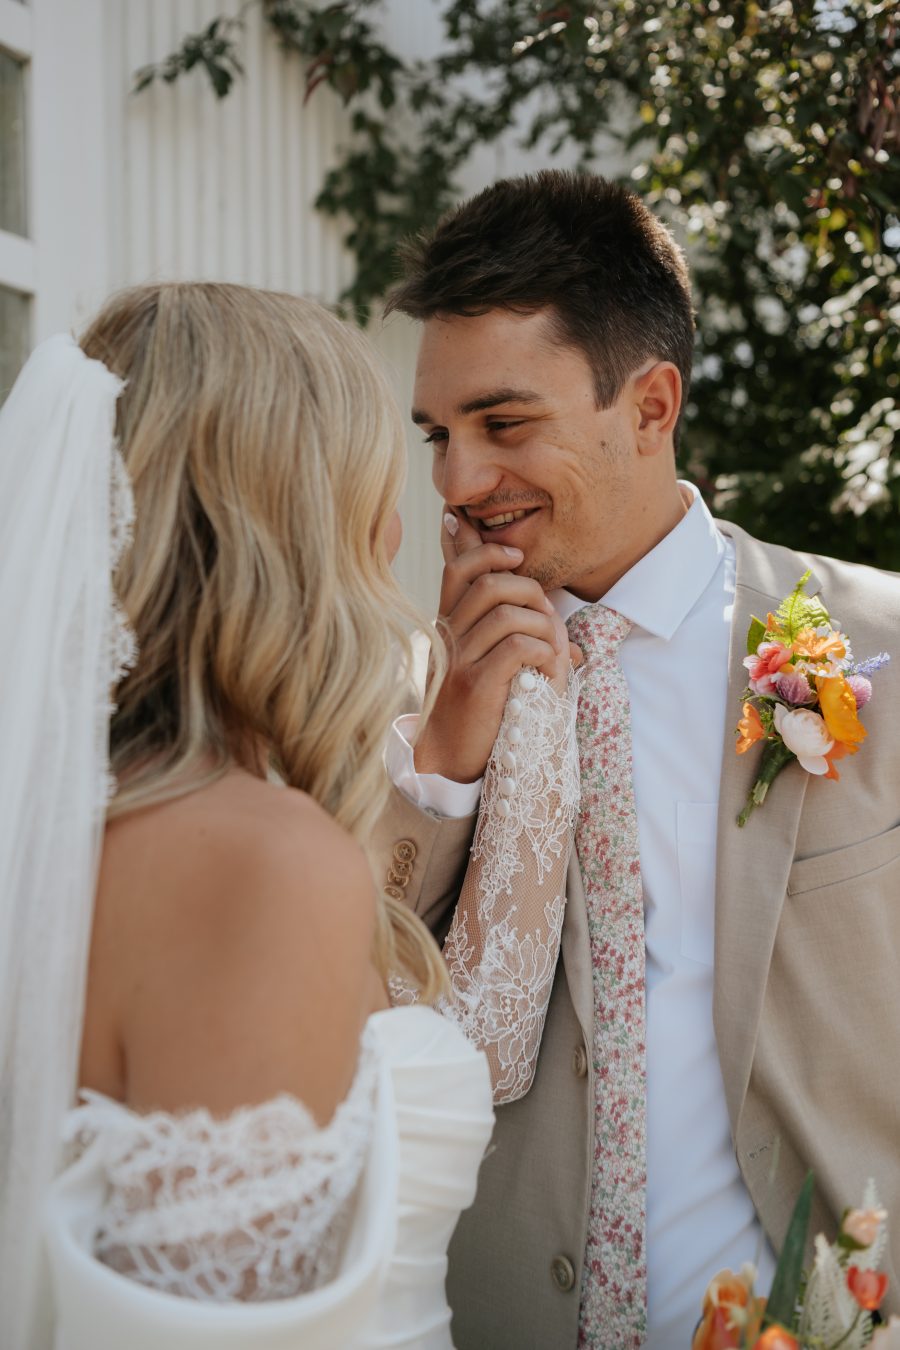
I also got the crazy idea to do all the florals for my daughters wedding! I did about 12 boutonneires and 6 bouquets and all the flowers for the tables, chairs, and signs!
Save for later
Too busy to get crafting today? No problem! Pin this post to remind yourself about this project later! Sharing my projects helps me reach more people, allowing me to continue sharing free content!
Final Thoughts on Making Corsages and Boutonnieres with Faux Flowers
Learning how to make a corsage and boutonniere with faux flowers is an easy DIY skill that delivers big results. With just a few supplies and a little creativity, you can create elegant floral accessories that look professional, cost less, and last forever.
Whether you’re preparing for a formal event or crafting for fun, faux flower corsages and boutonnieres are a beautiful DIY win 🌸
Leave a Reply